> ## Documentation Index
> Fetch the complete documentation index at: https://docs.blis.app/llms.txt
> Use this file to discover all available pages before exploring further.
# Microsoft SAML
> Set up a SAML application in Azure Portal for bLIS
This guide contains instructions for setting up a new SAML application in Azure Portal (Microsoft 365).
For questions or support, please reach out to [support@blis.app](mailto:support@blis.app).
## Inputs
The following values will be provided by Gamma Peak:
* Entity ID
* Reply URL
## Outputs
After following the instructions below, you will provide the following values to Gamma Peak:
* Metadata URL
* Certificate (Base64)
* Login URL
***
# Instructions
## 1. Log in to Azure Portal
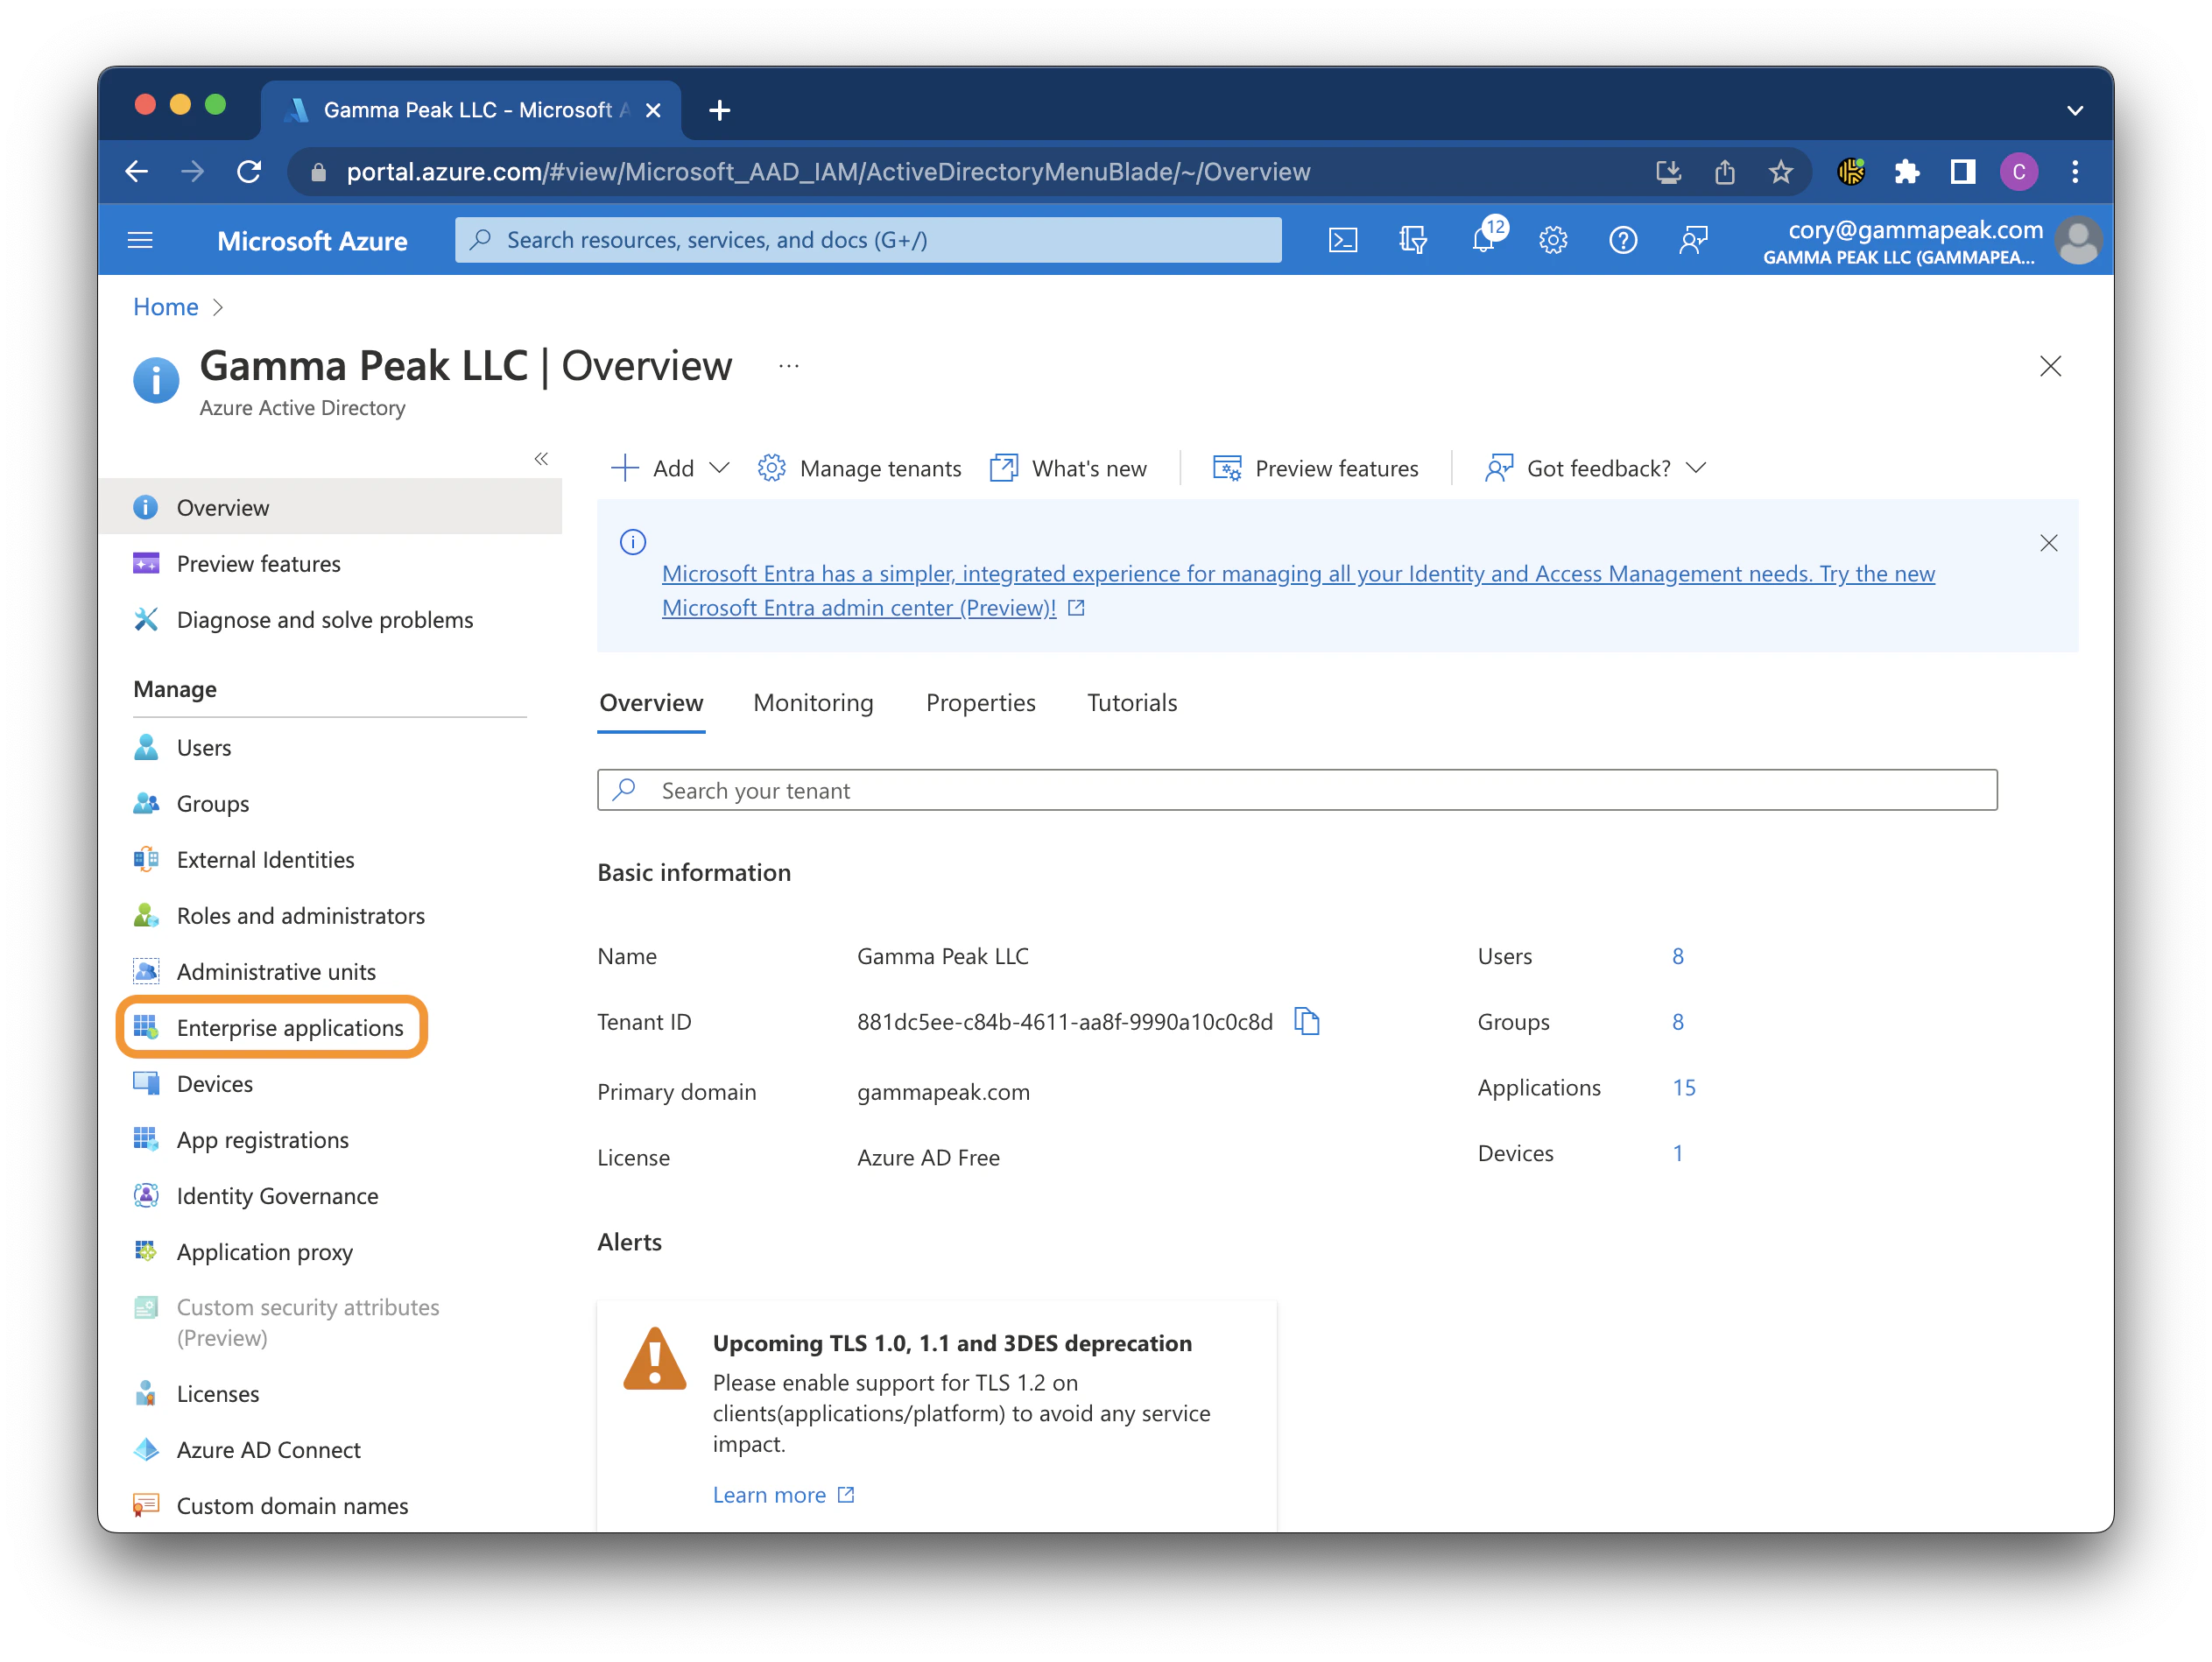
Log in to the [Azure Active Directory Admin dashboard](https://portal.azure.com/#view/Microsoft_AAD_IAM/ActiveDirectoryMenuBlade/~/Overview). Select **Enterprise applications** from the menu on the left.
 ## 2. Create a new enterprise application
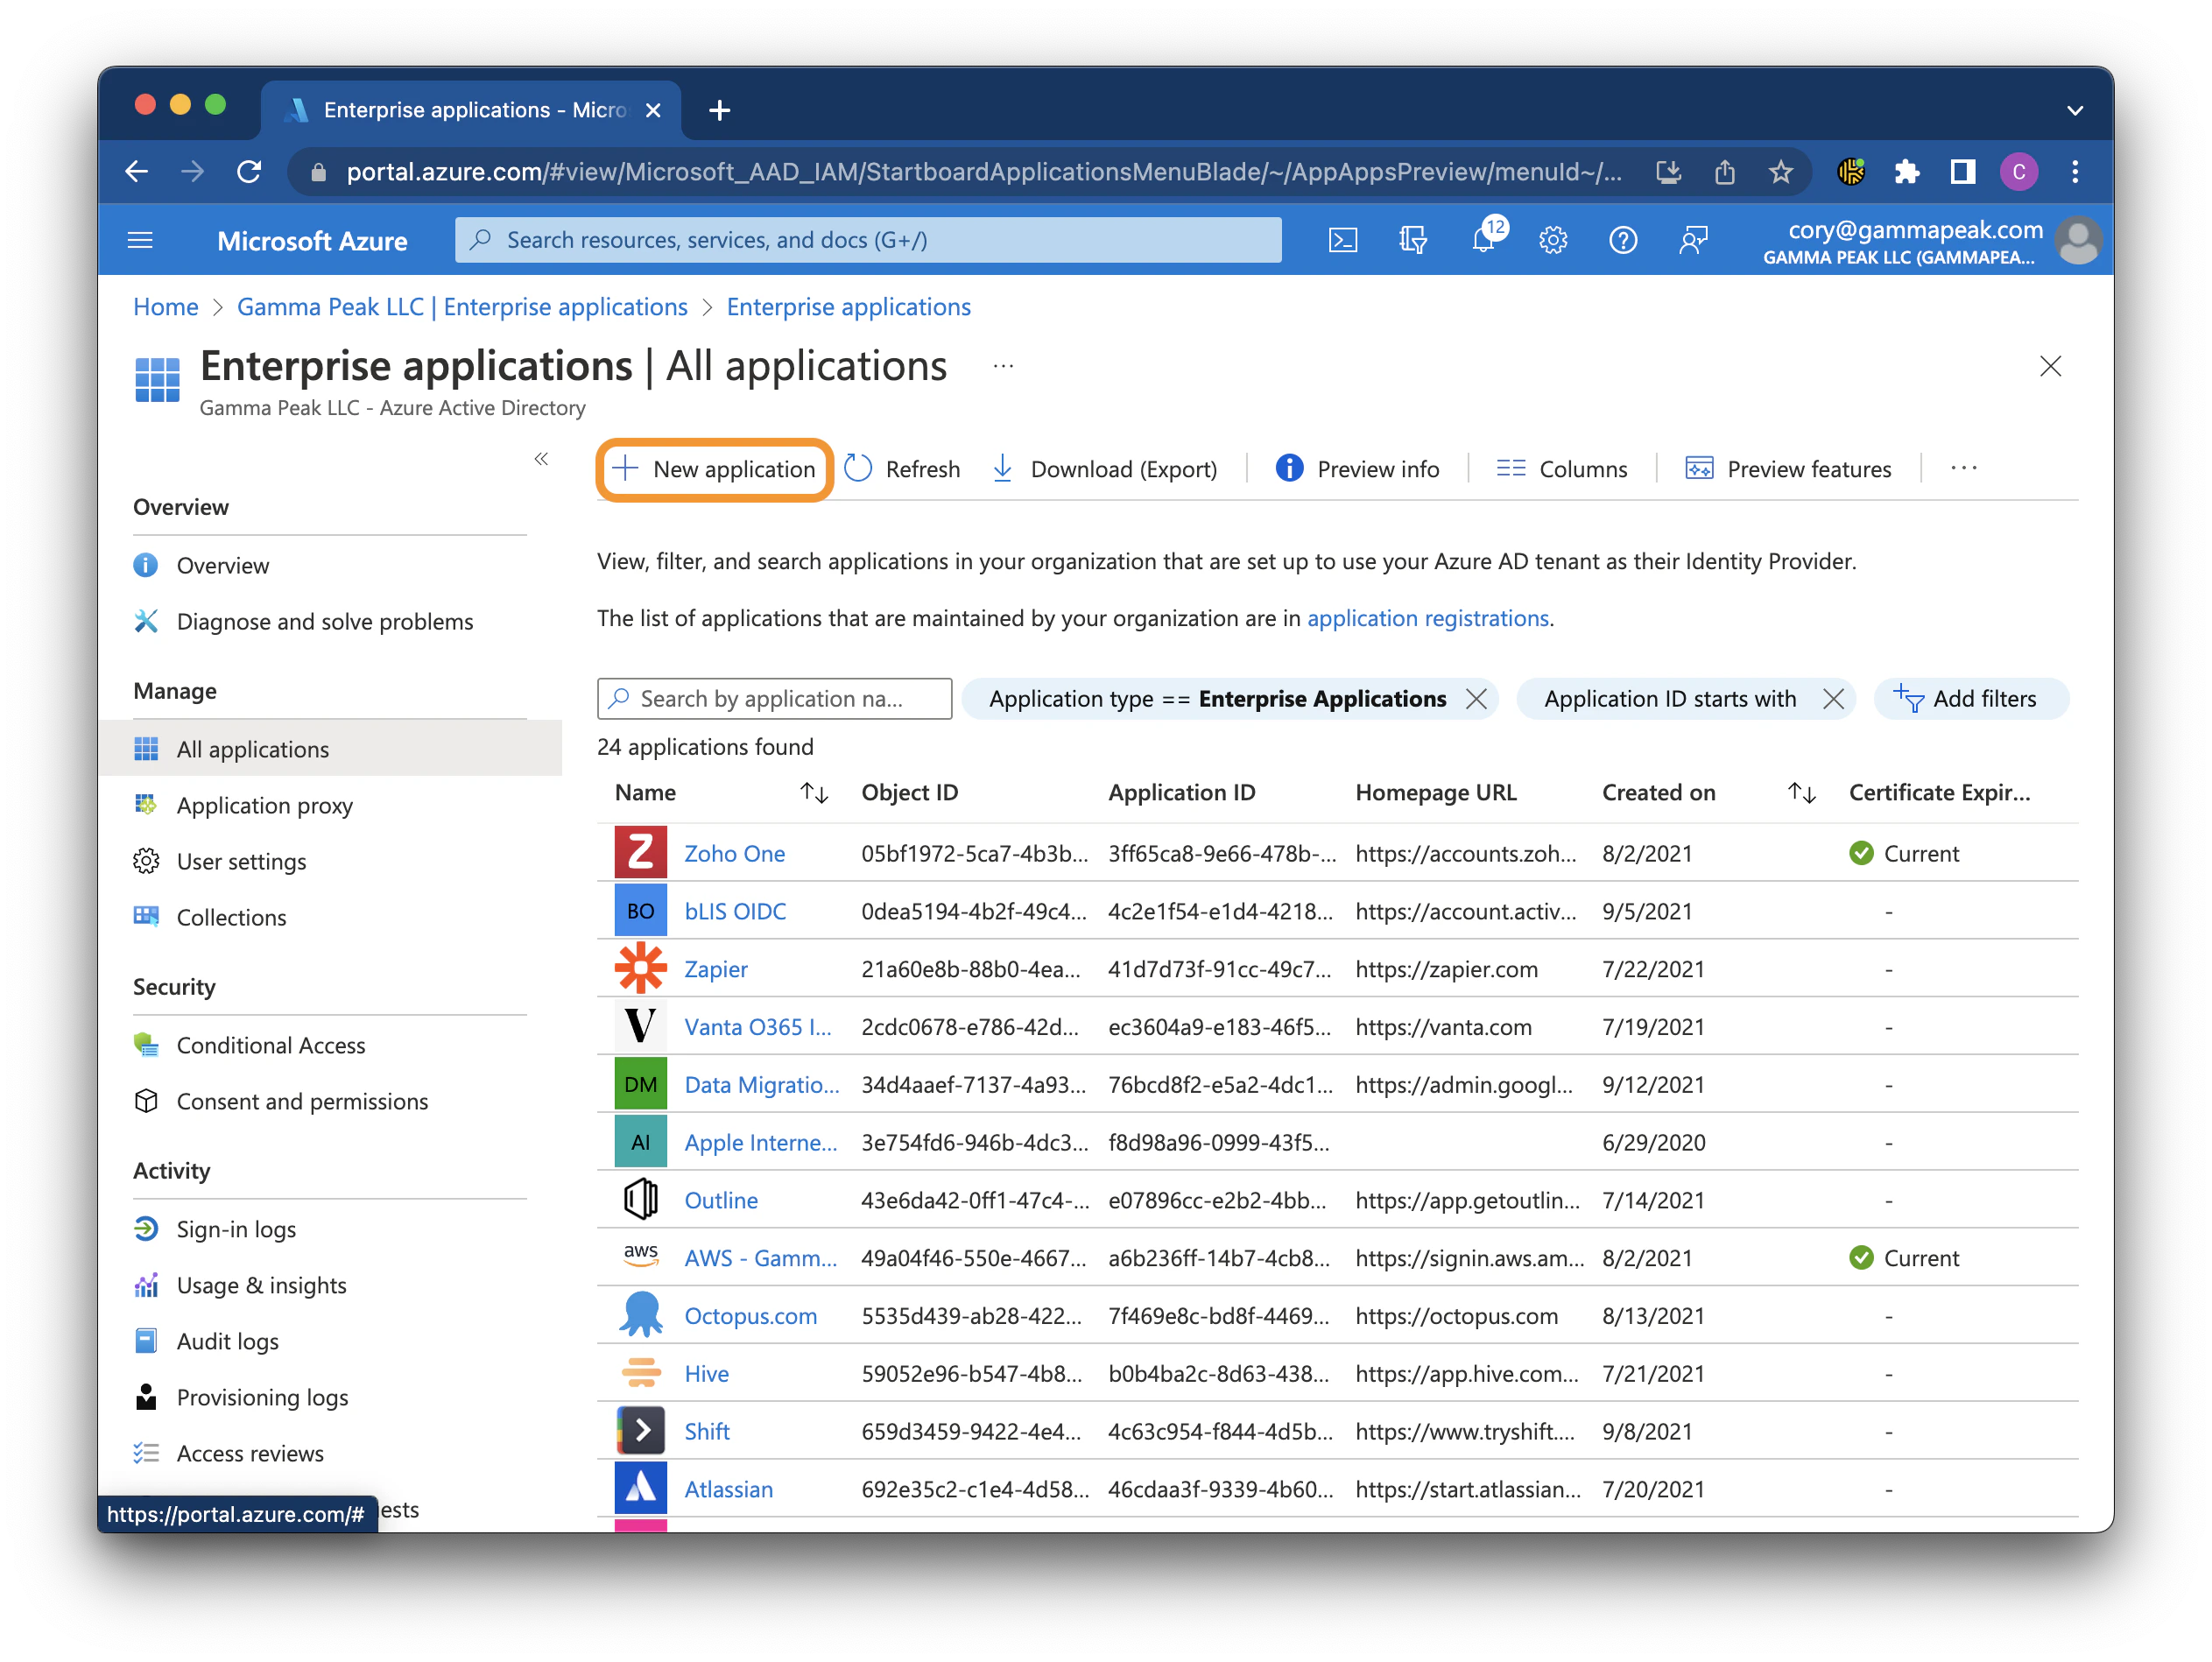
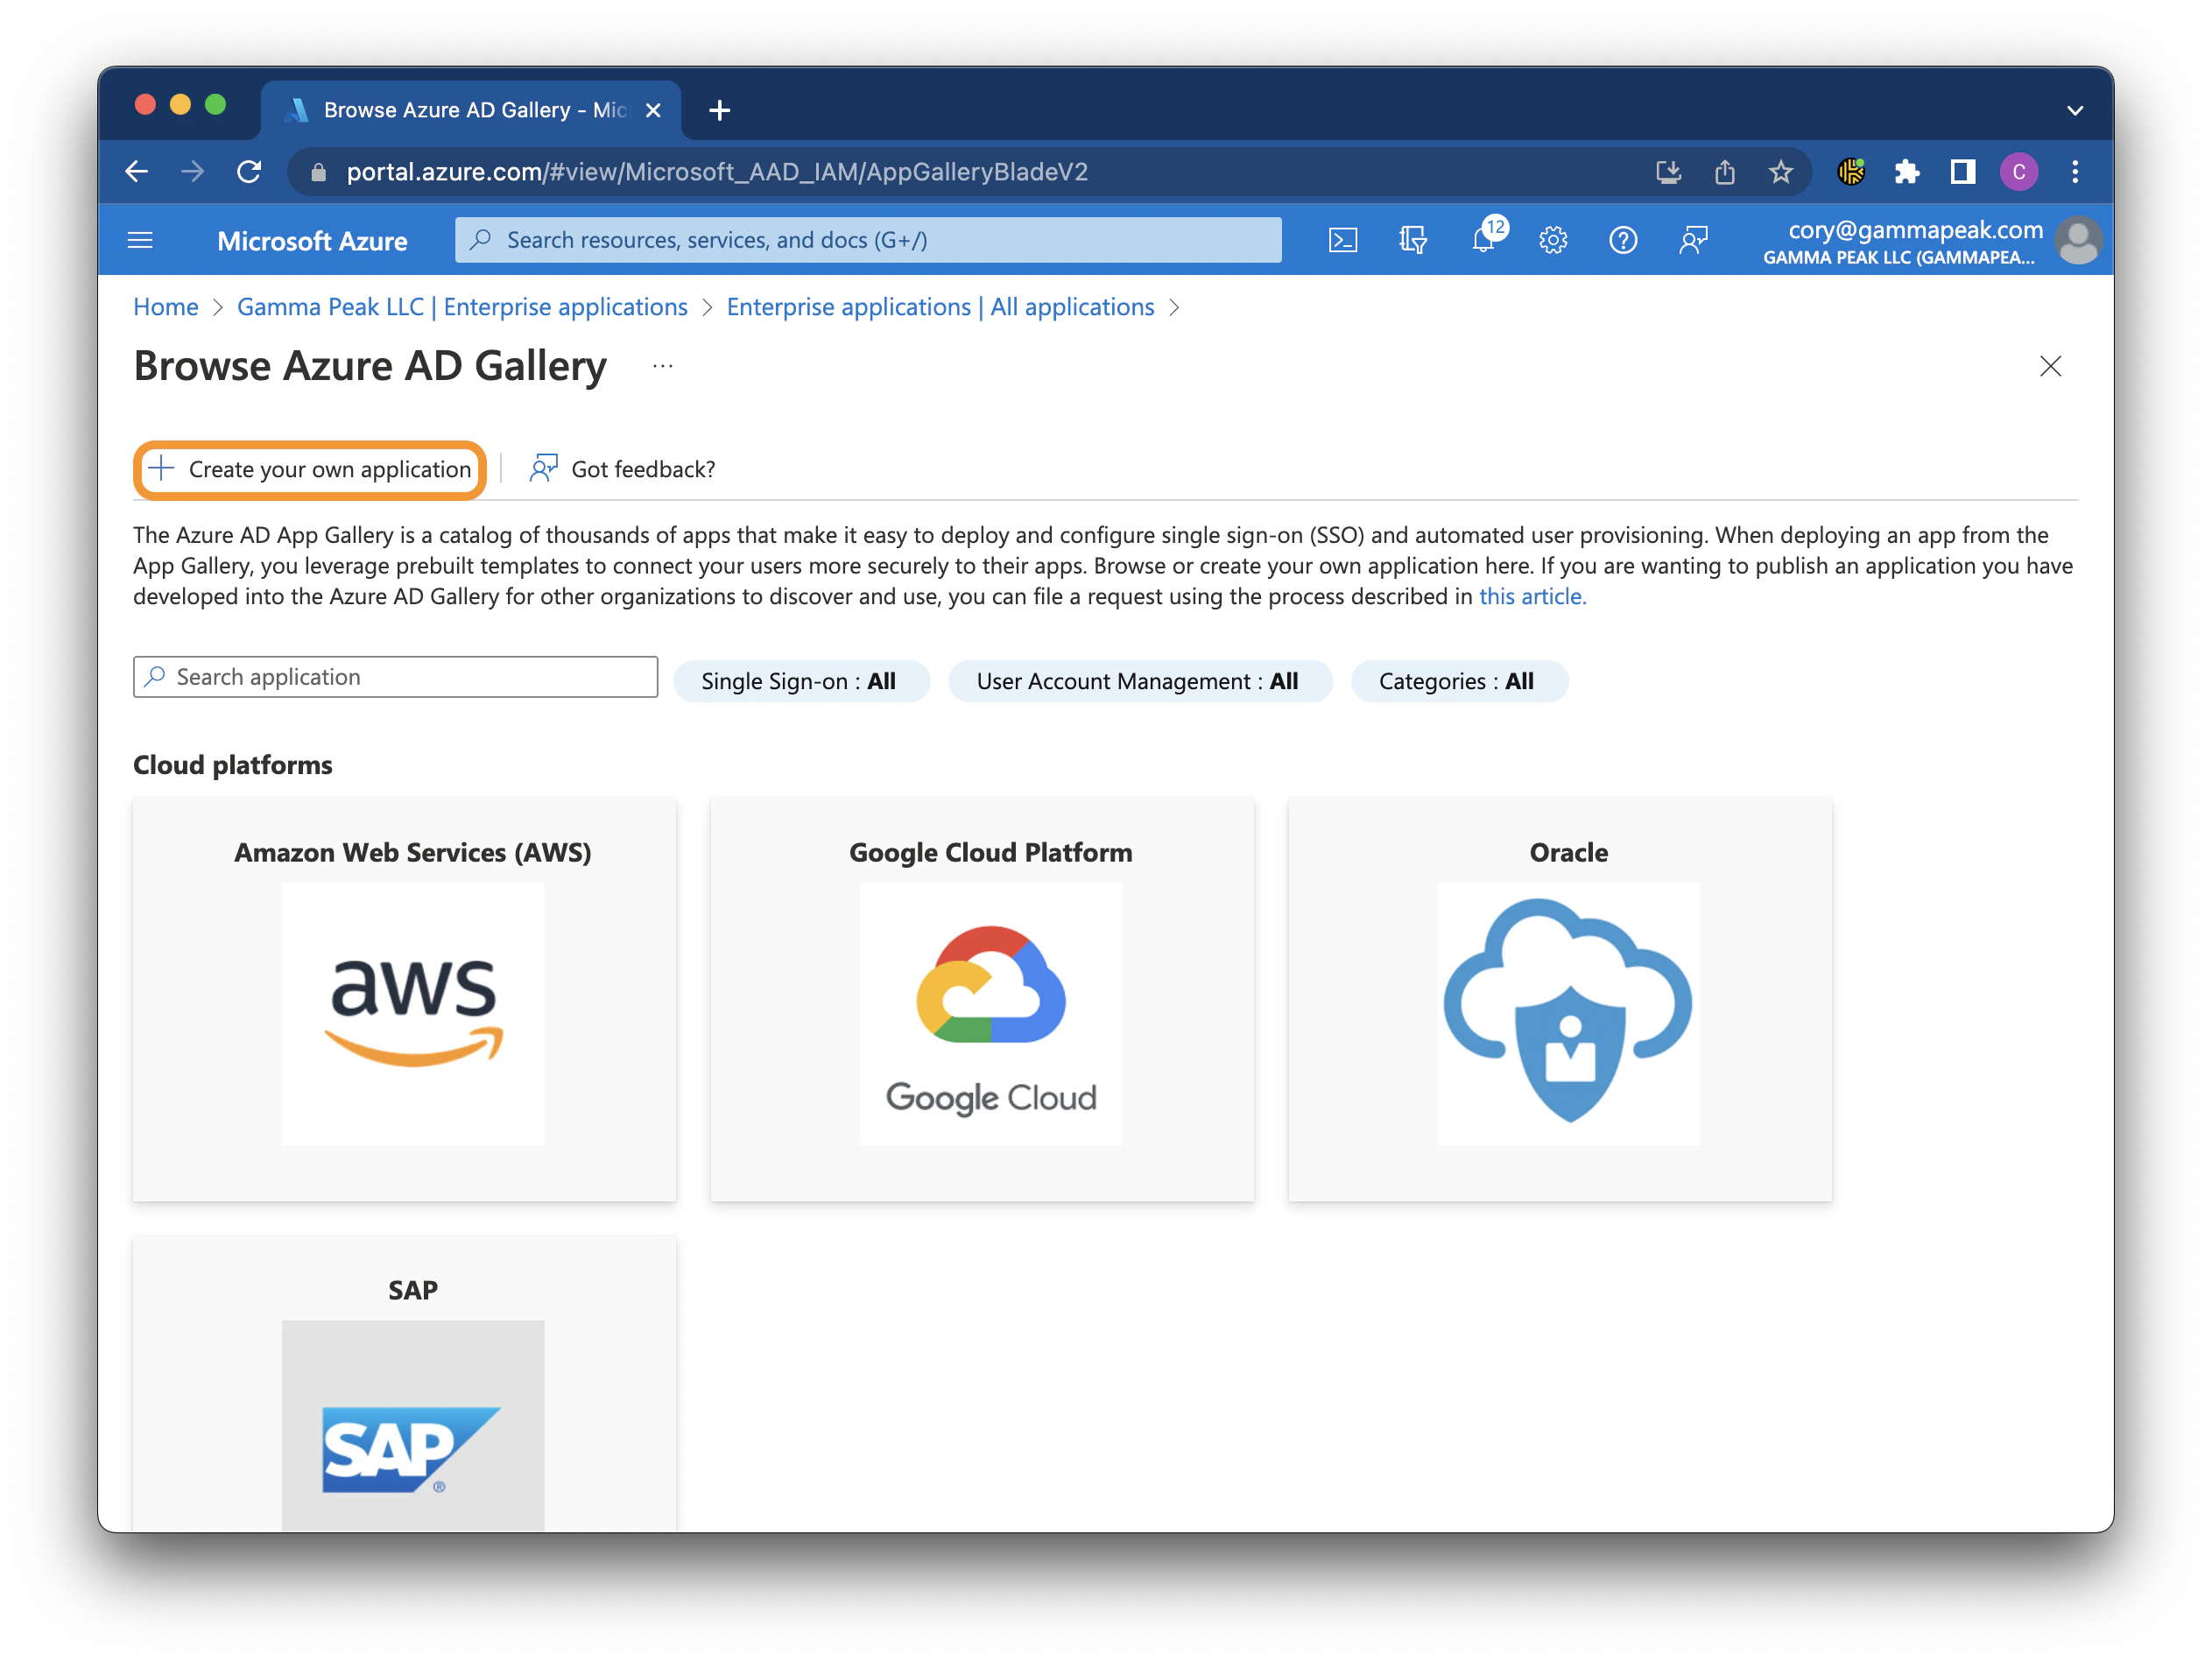
Click **New application**, then click **Create your own application**.
## 2. Create a new enterprise application
Click **New application**, then click **Create your own application**.
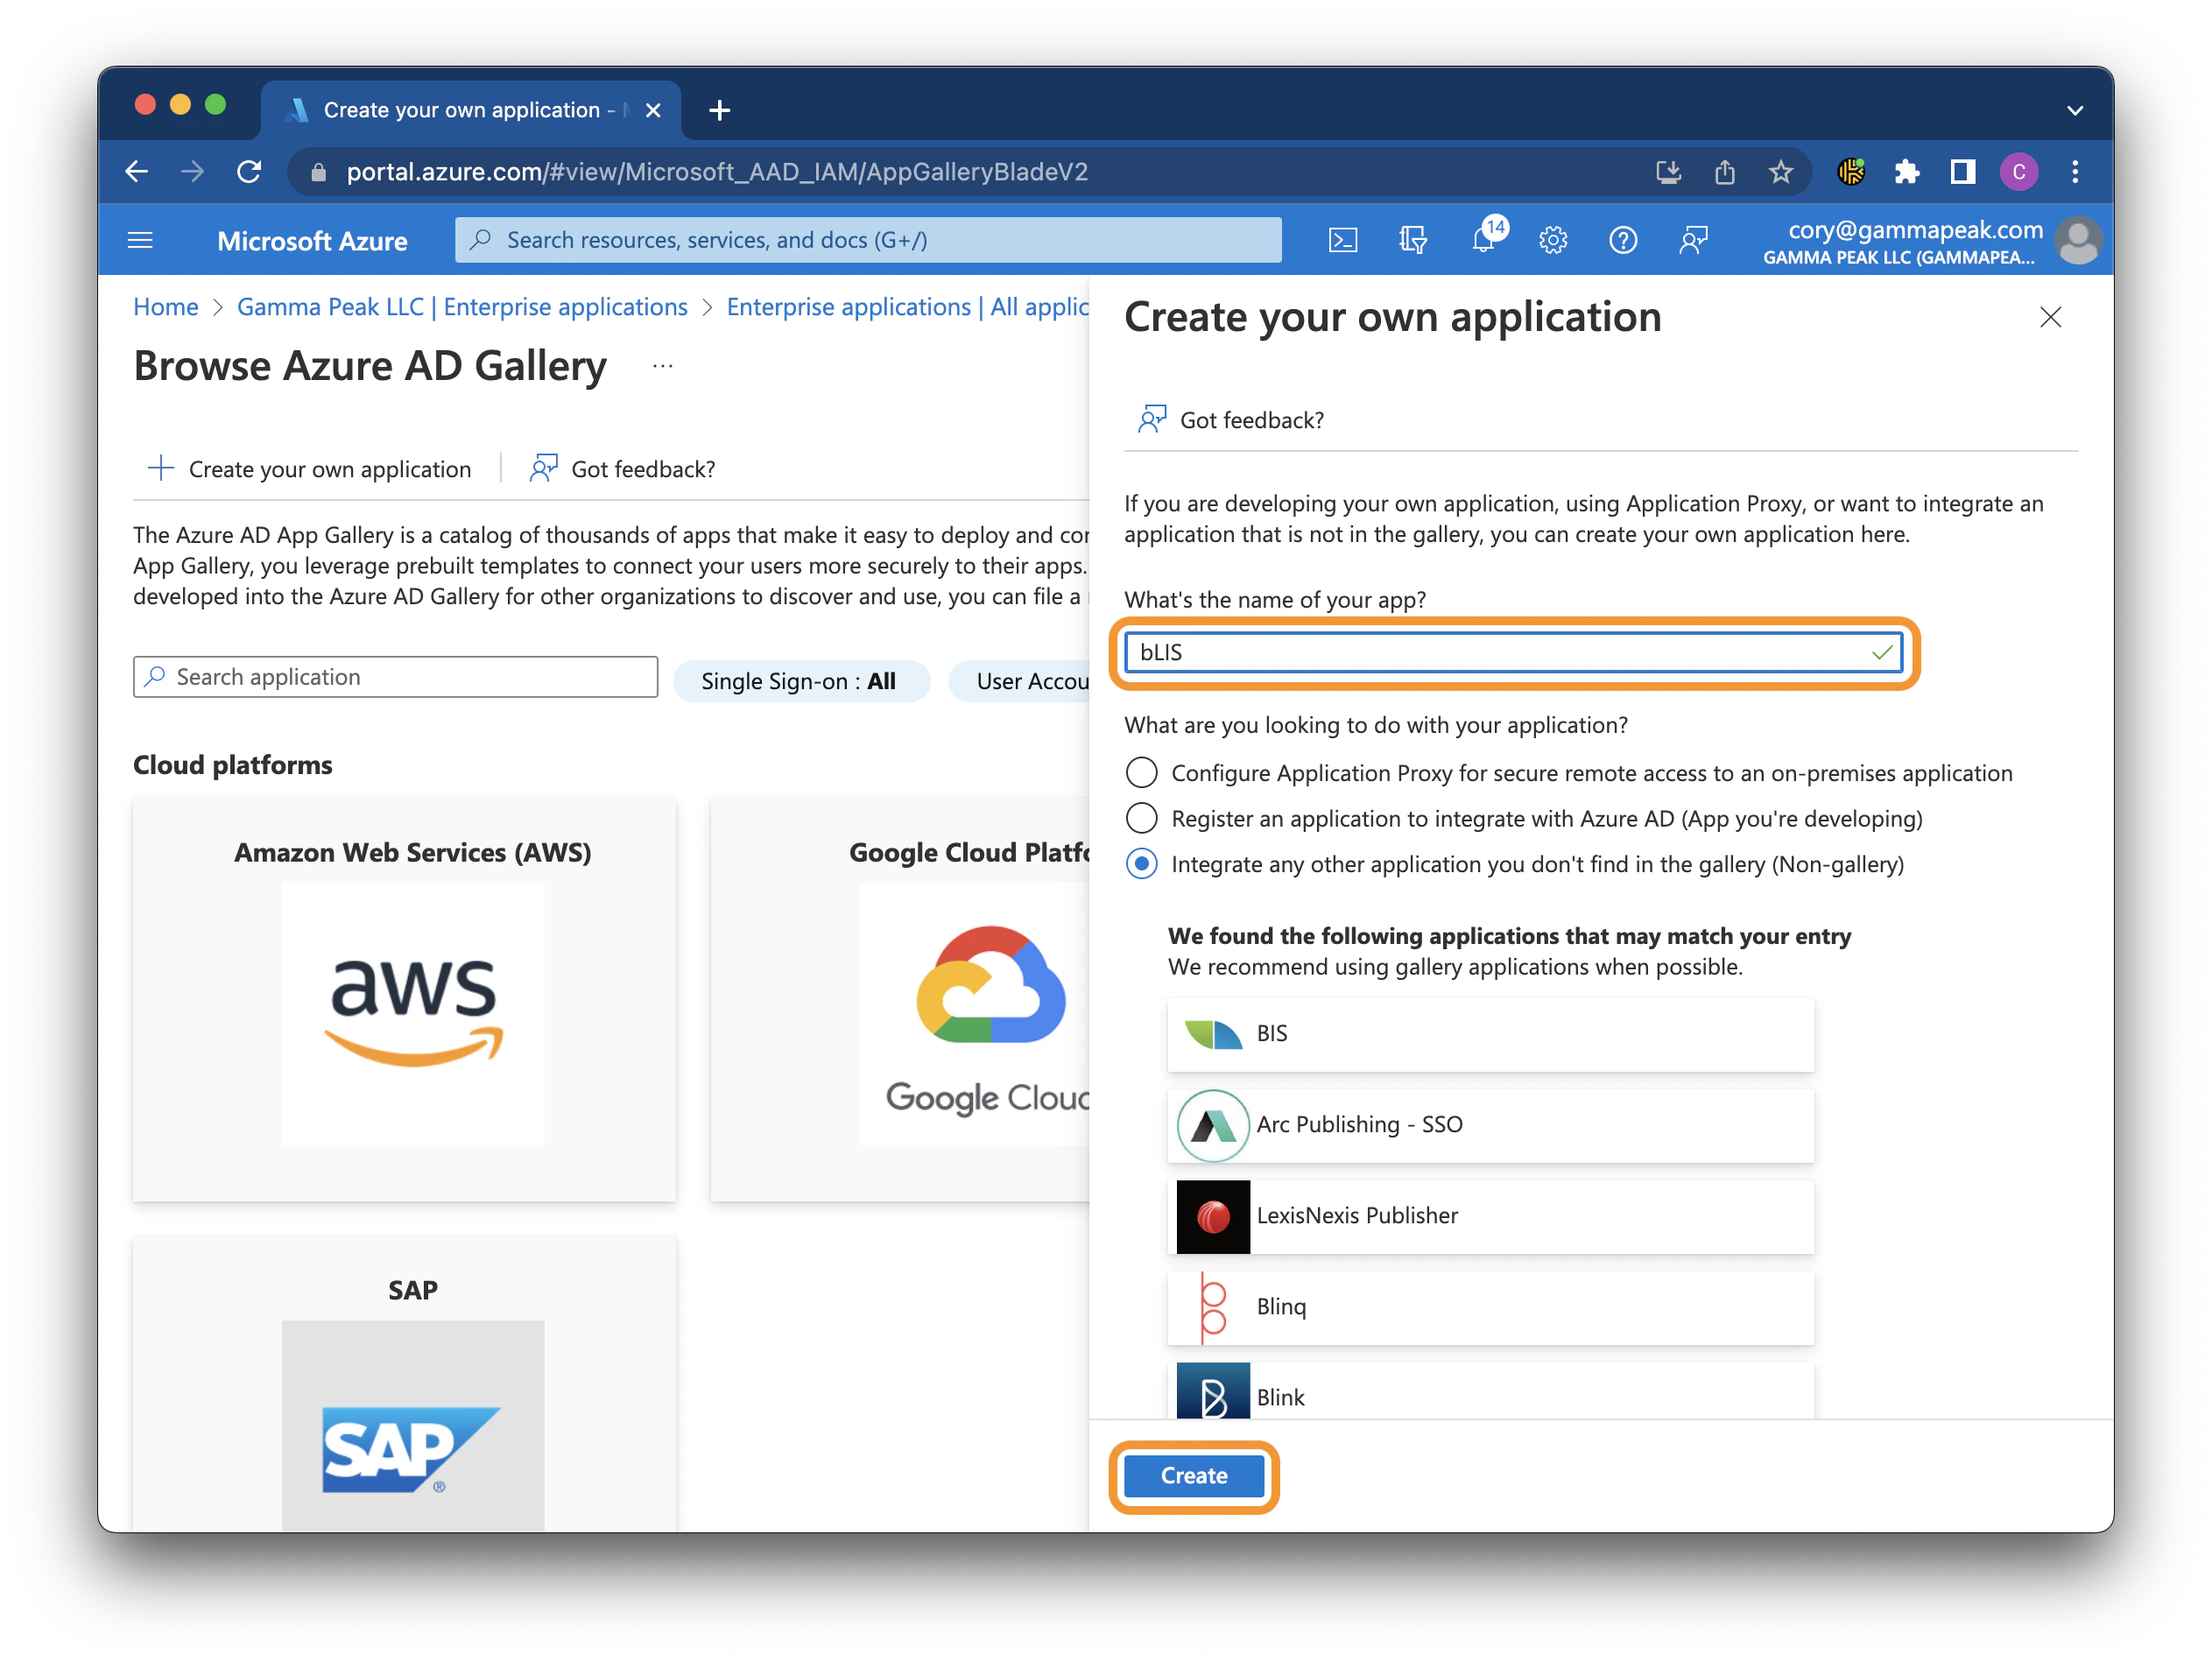
 Enter a name for the application (e.g., `bLIS`) and click **Create**.
 ## 3. Configure SAML
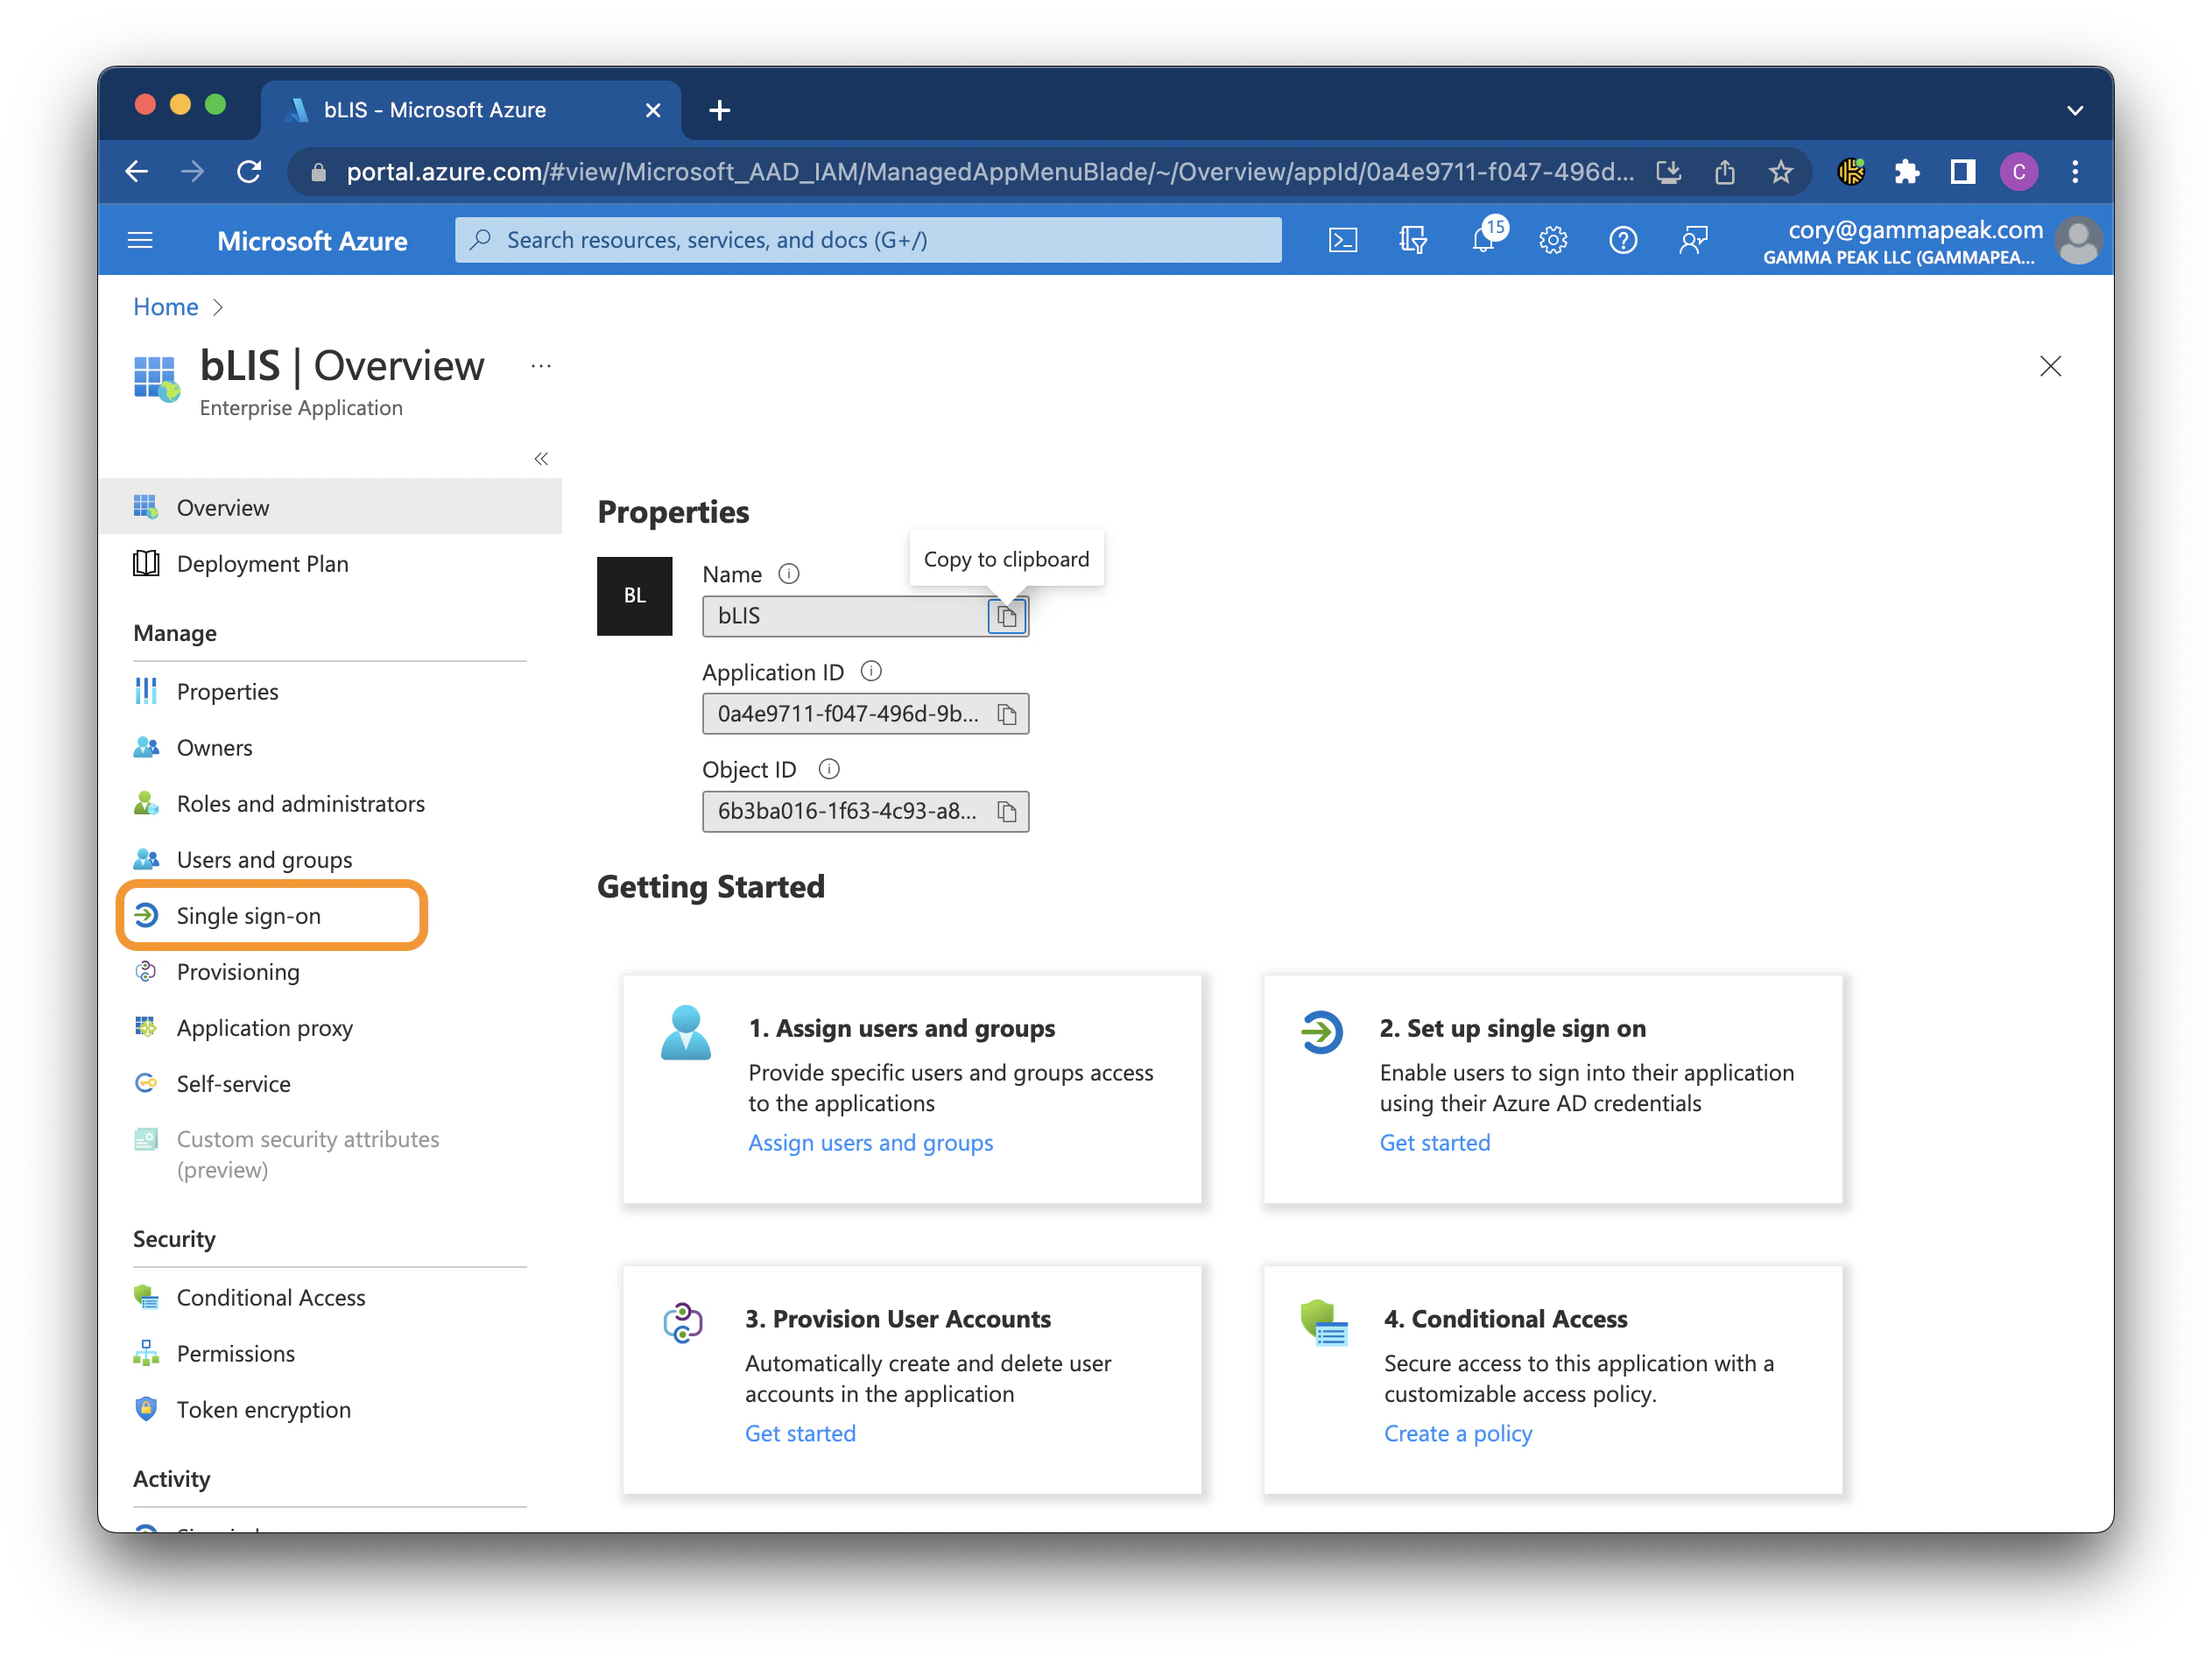
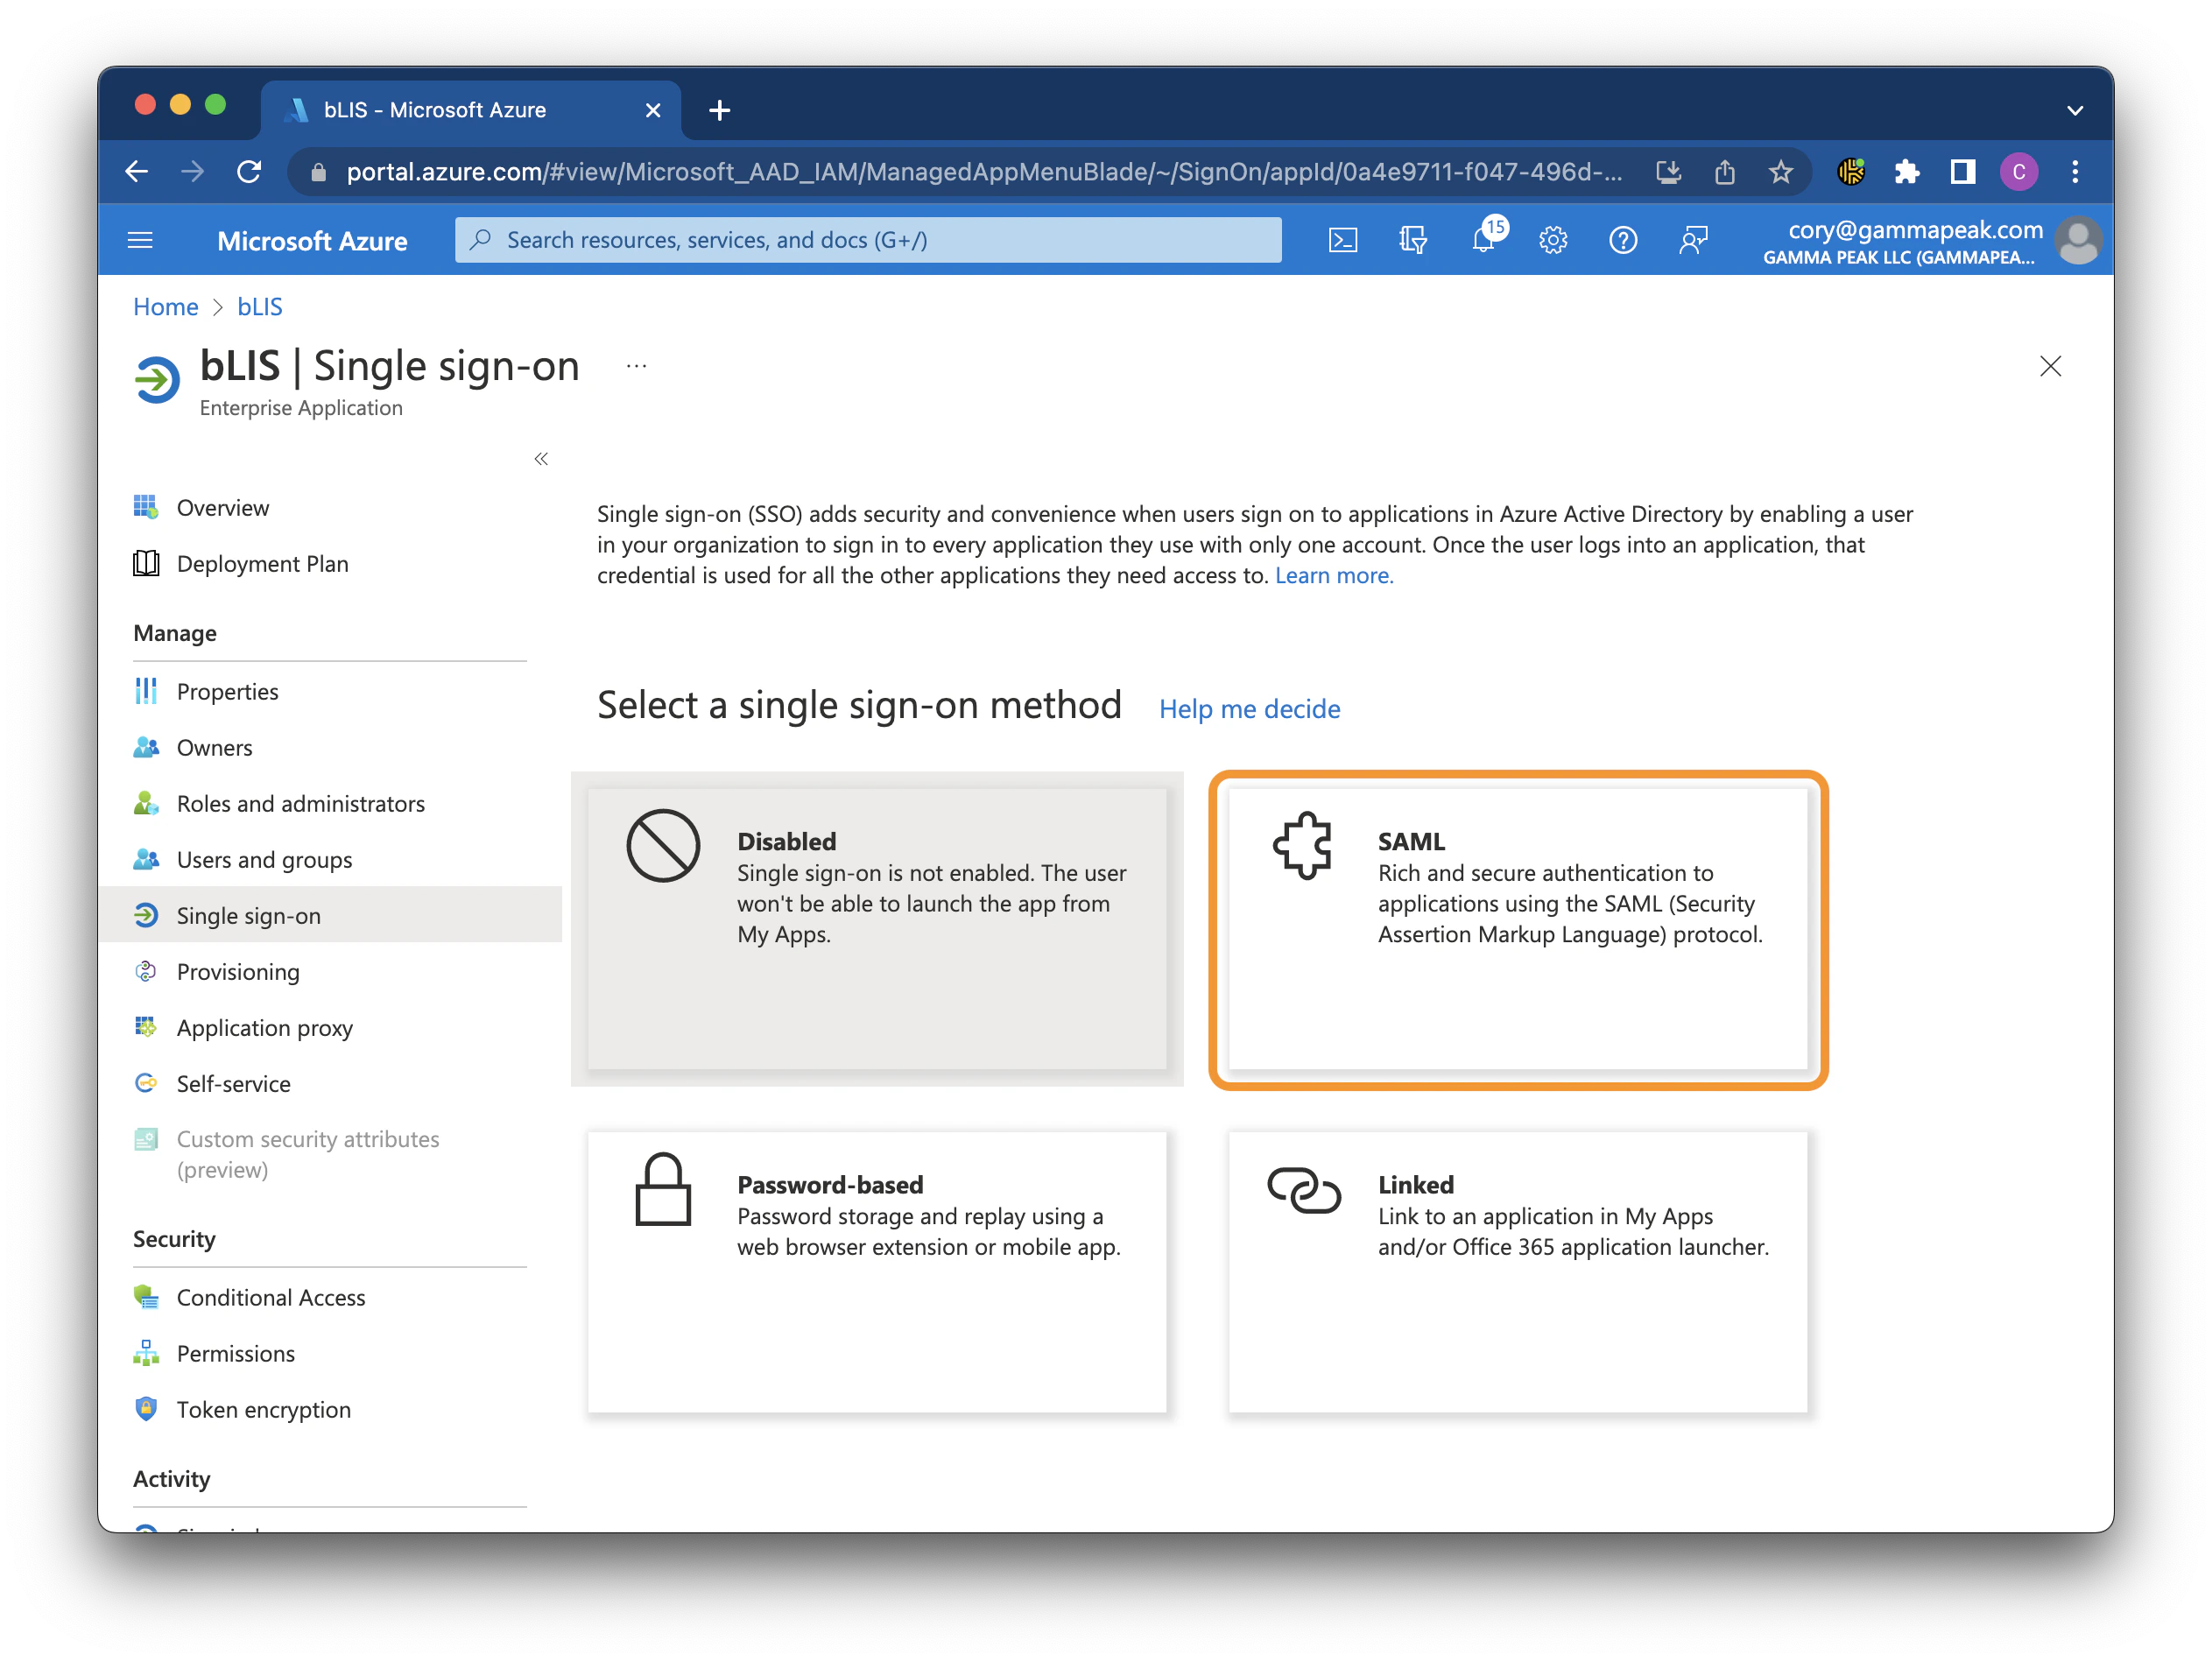
Once the application is created, click **Single sign-on** in the left menu, then click the **SAML** tile.
## 3. Configure SAML
Once the application is created, click **Single sign-on** in the left menu, then click the **SAML** tile.
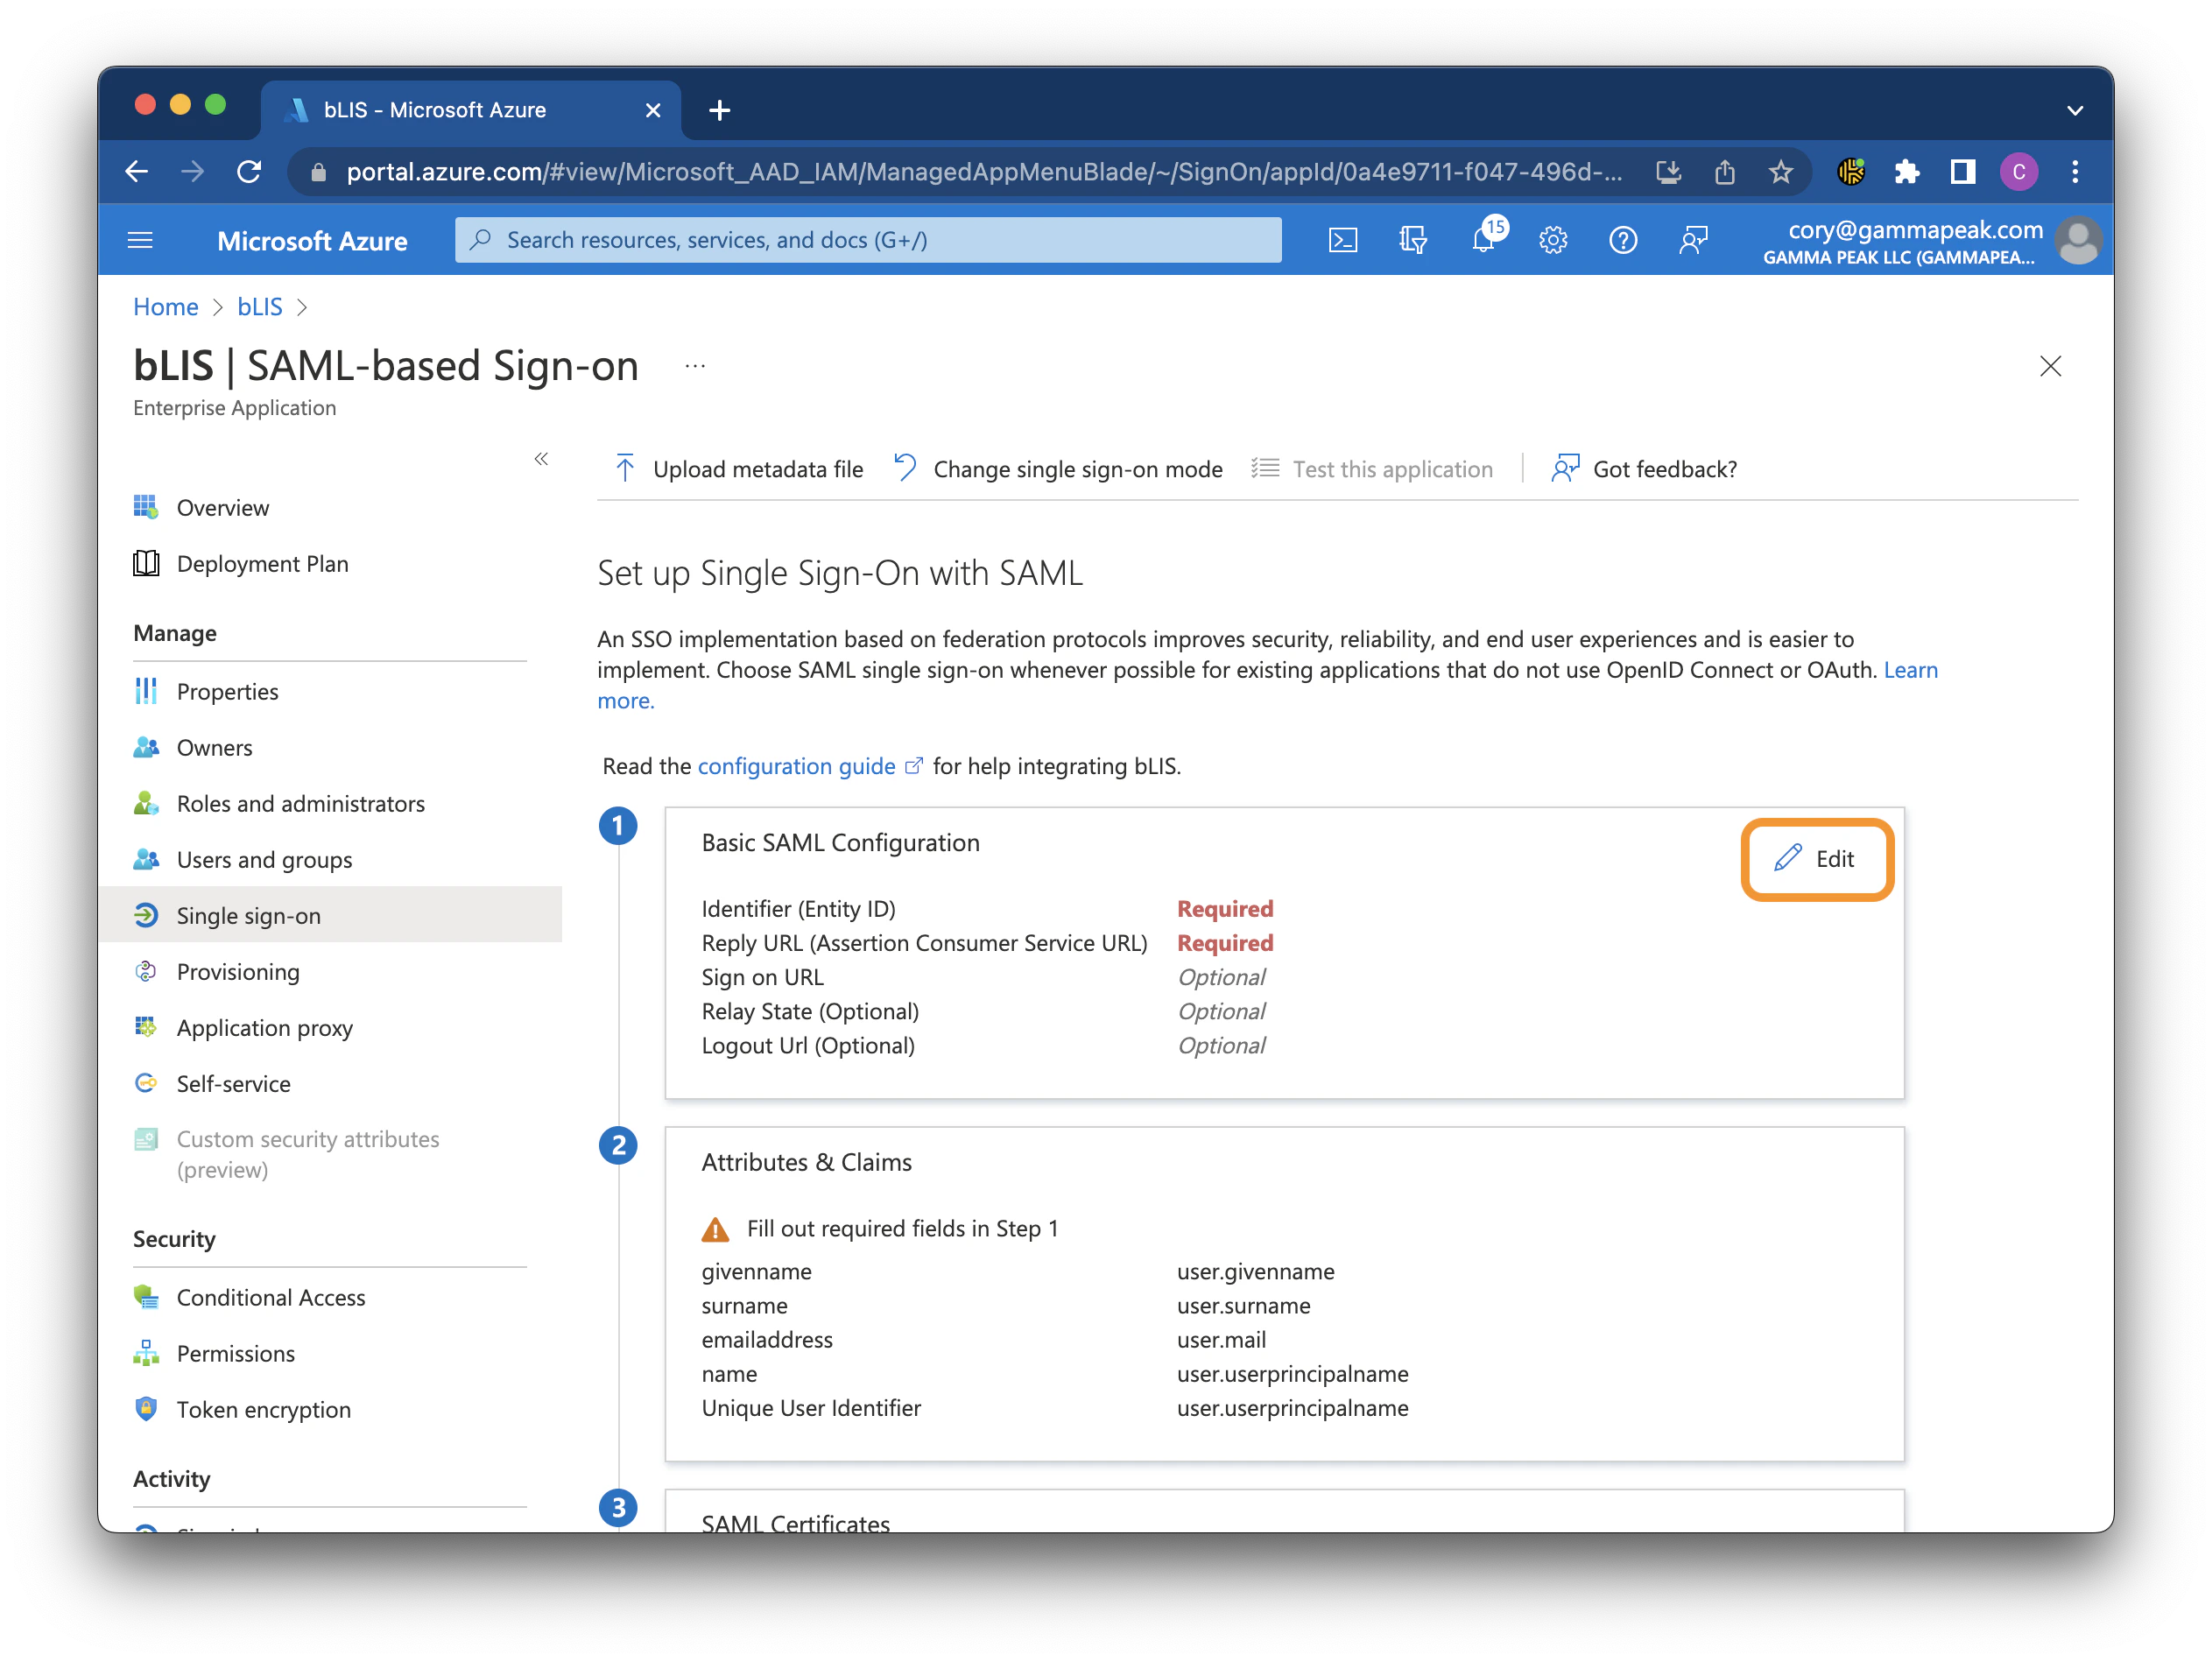
 Click the **Edit** button on the **Basic SAML Configuration** section.
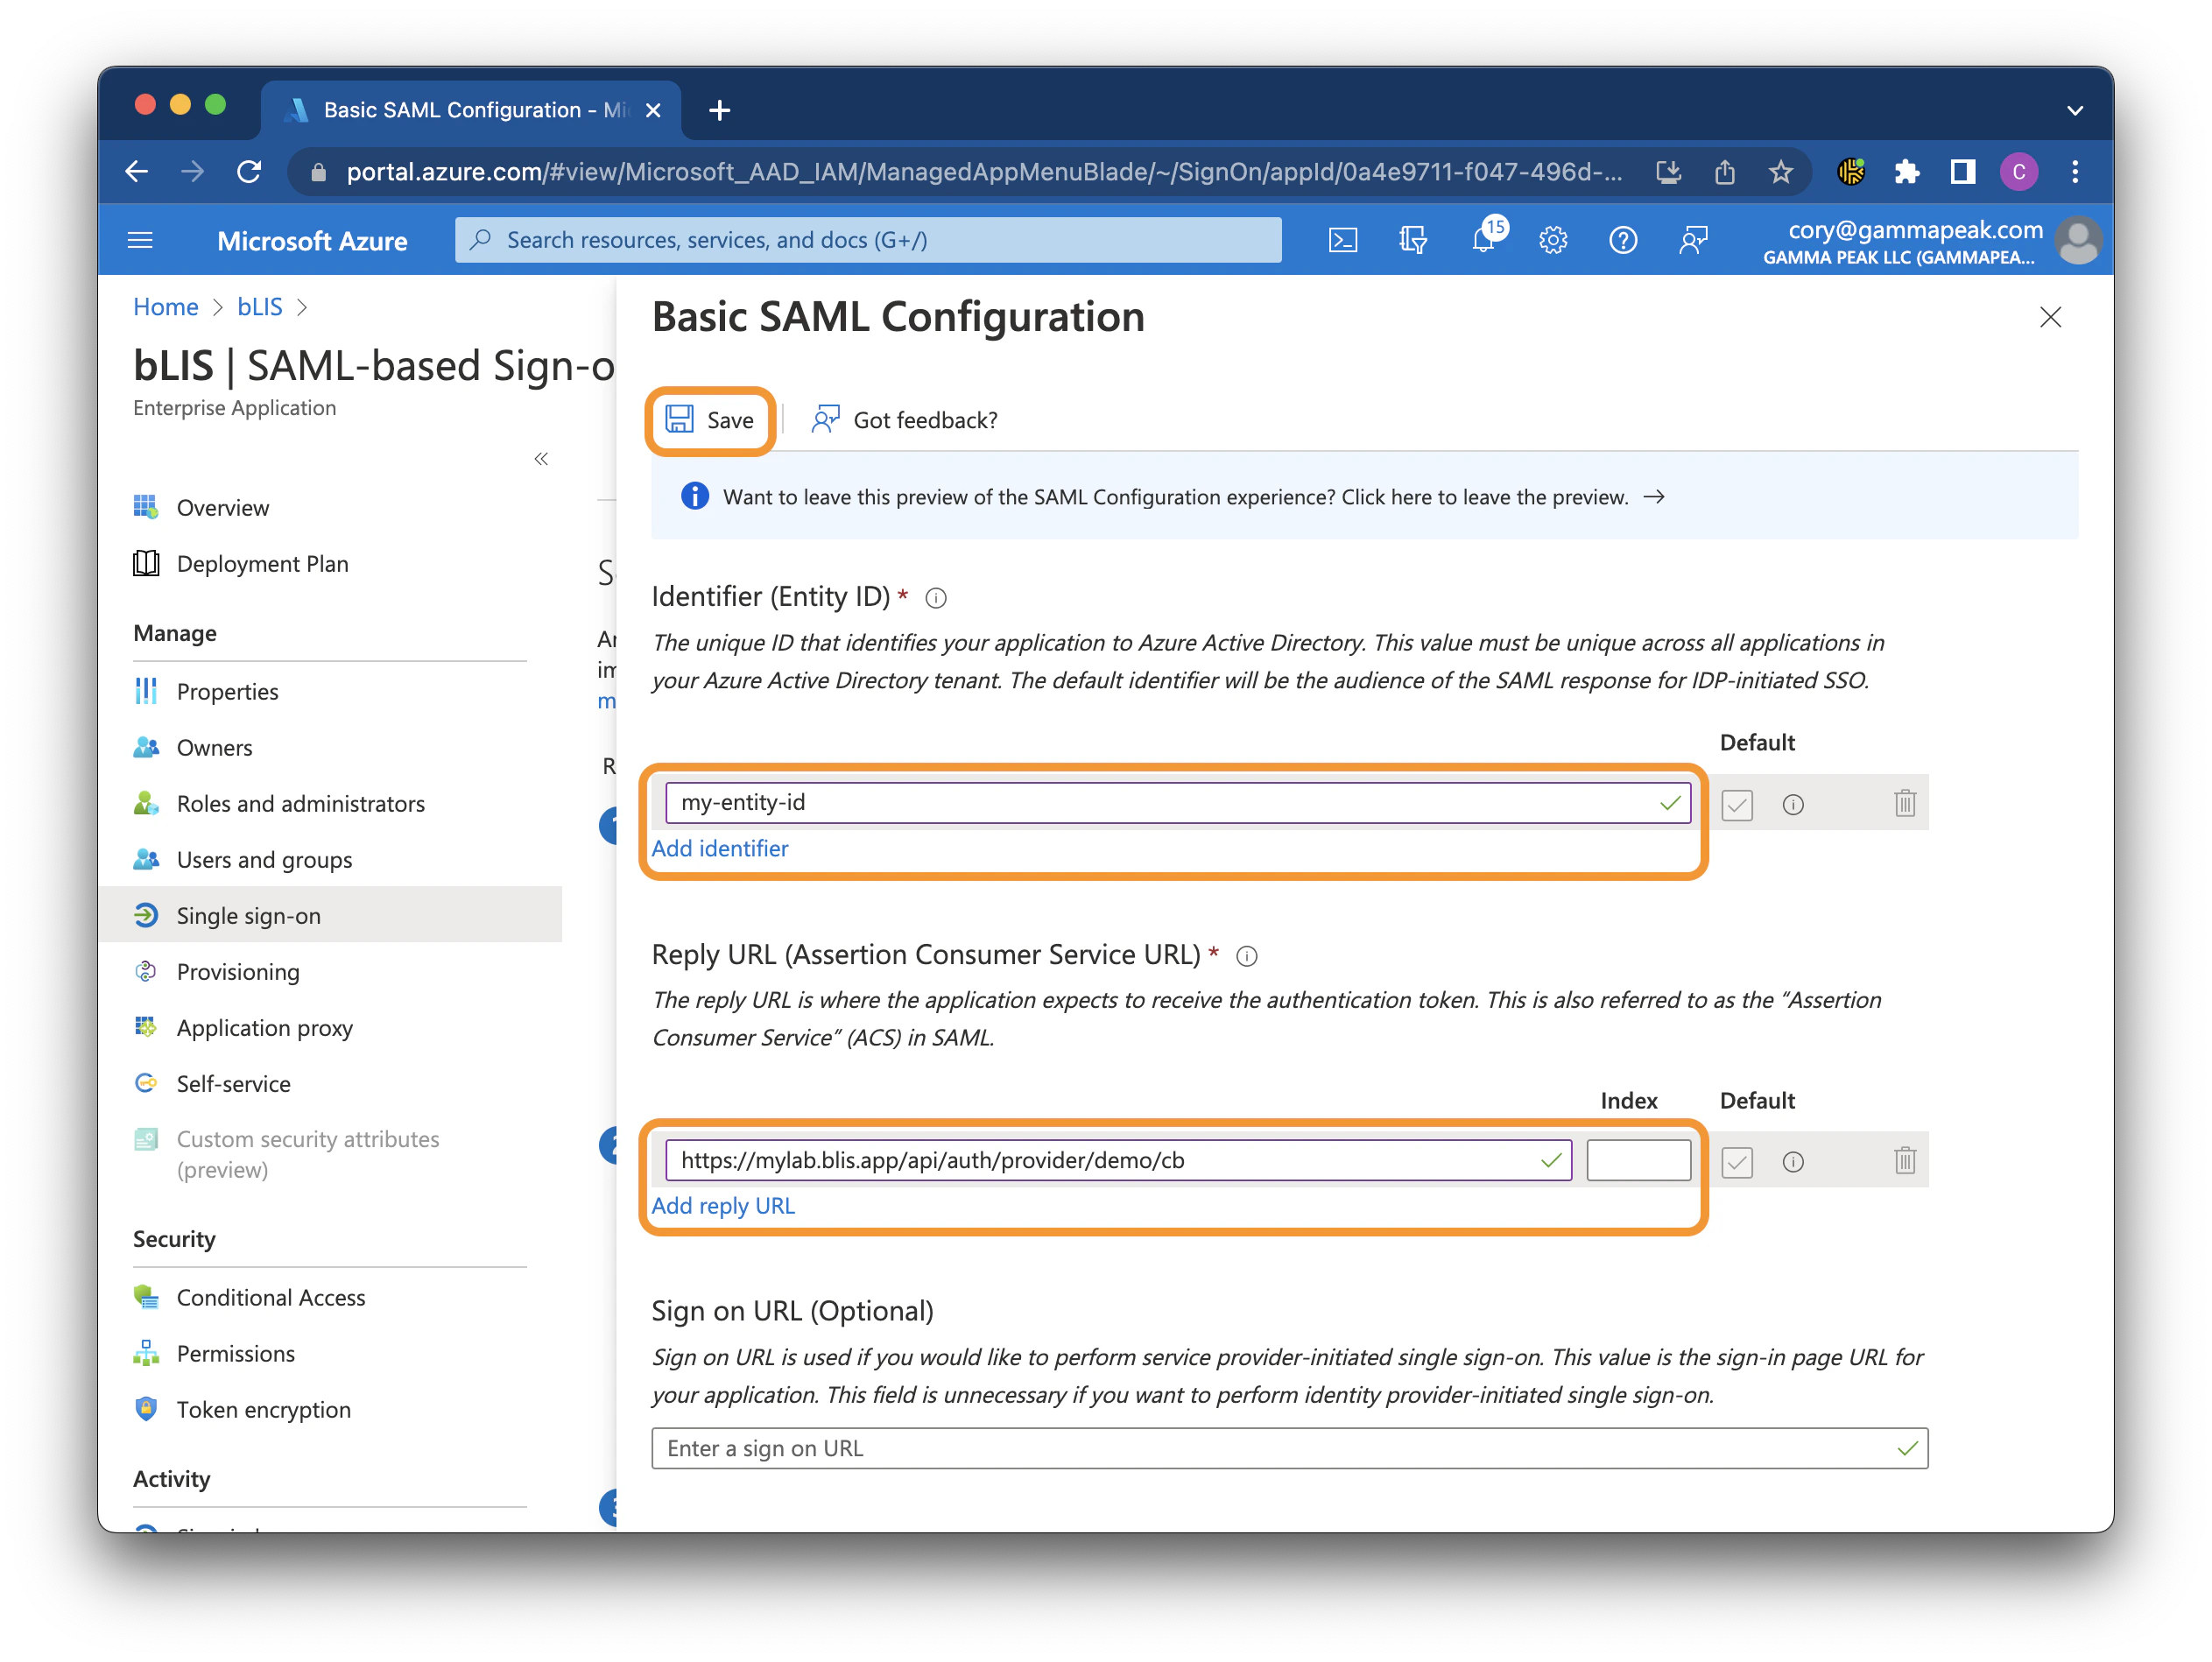
 Enter the **Entity ID** and **Reply URL** values provided to you by Gamma Peak. If multiple Reply URLs were provided, add them all here. Click **Save**.
 ## 4. Copy and save outputs
Scroll down on the SAML configuration page to locate the output values.
**Metadata URL** — In the **SAML Signing Certificate** section, locate the **App Federation Metadata Url**. Copy and save this value.
## 4. Copy and save outputs
Scroll down on the SAML configuration page to locate the output values.
**Metadata URL** — In the **SAML Signing Certificate** section, locate the **App Federation Metadata Url**. Copy and save this value.
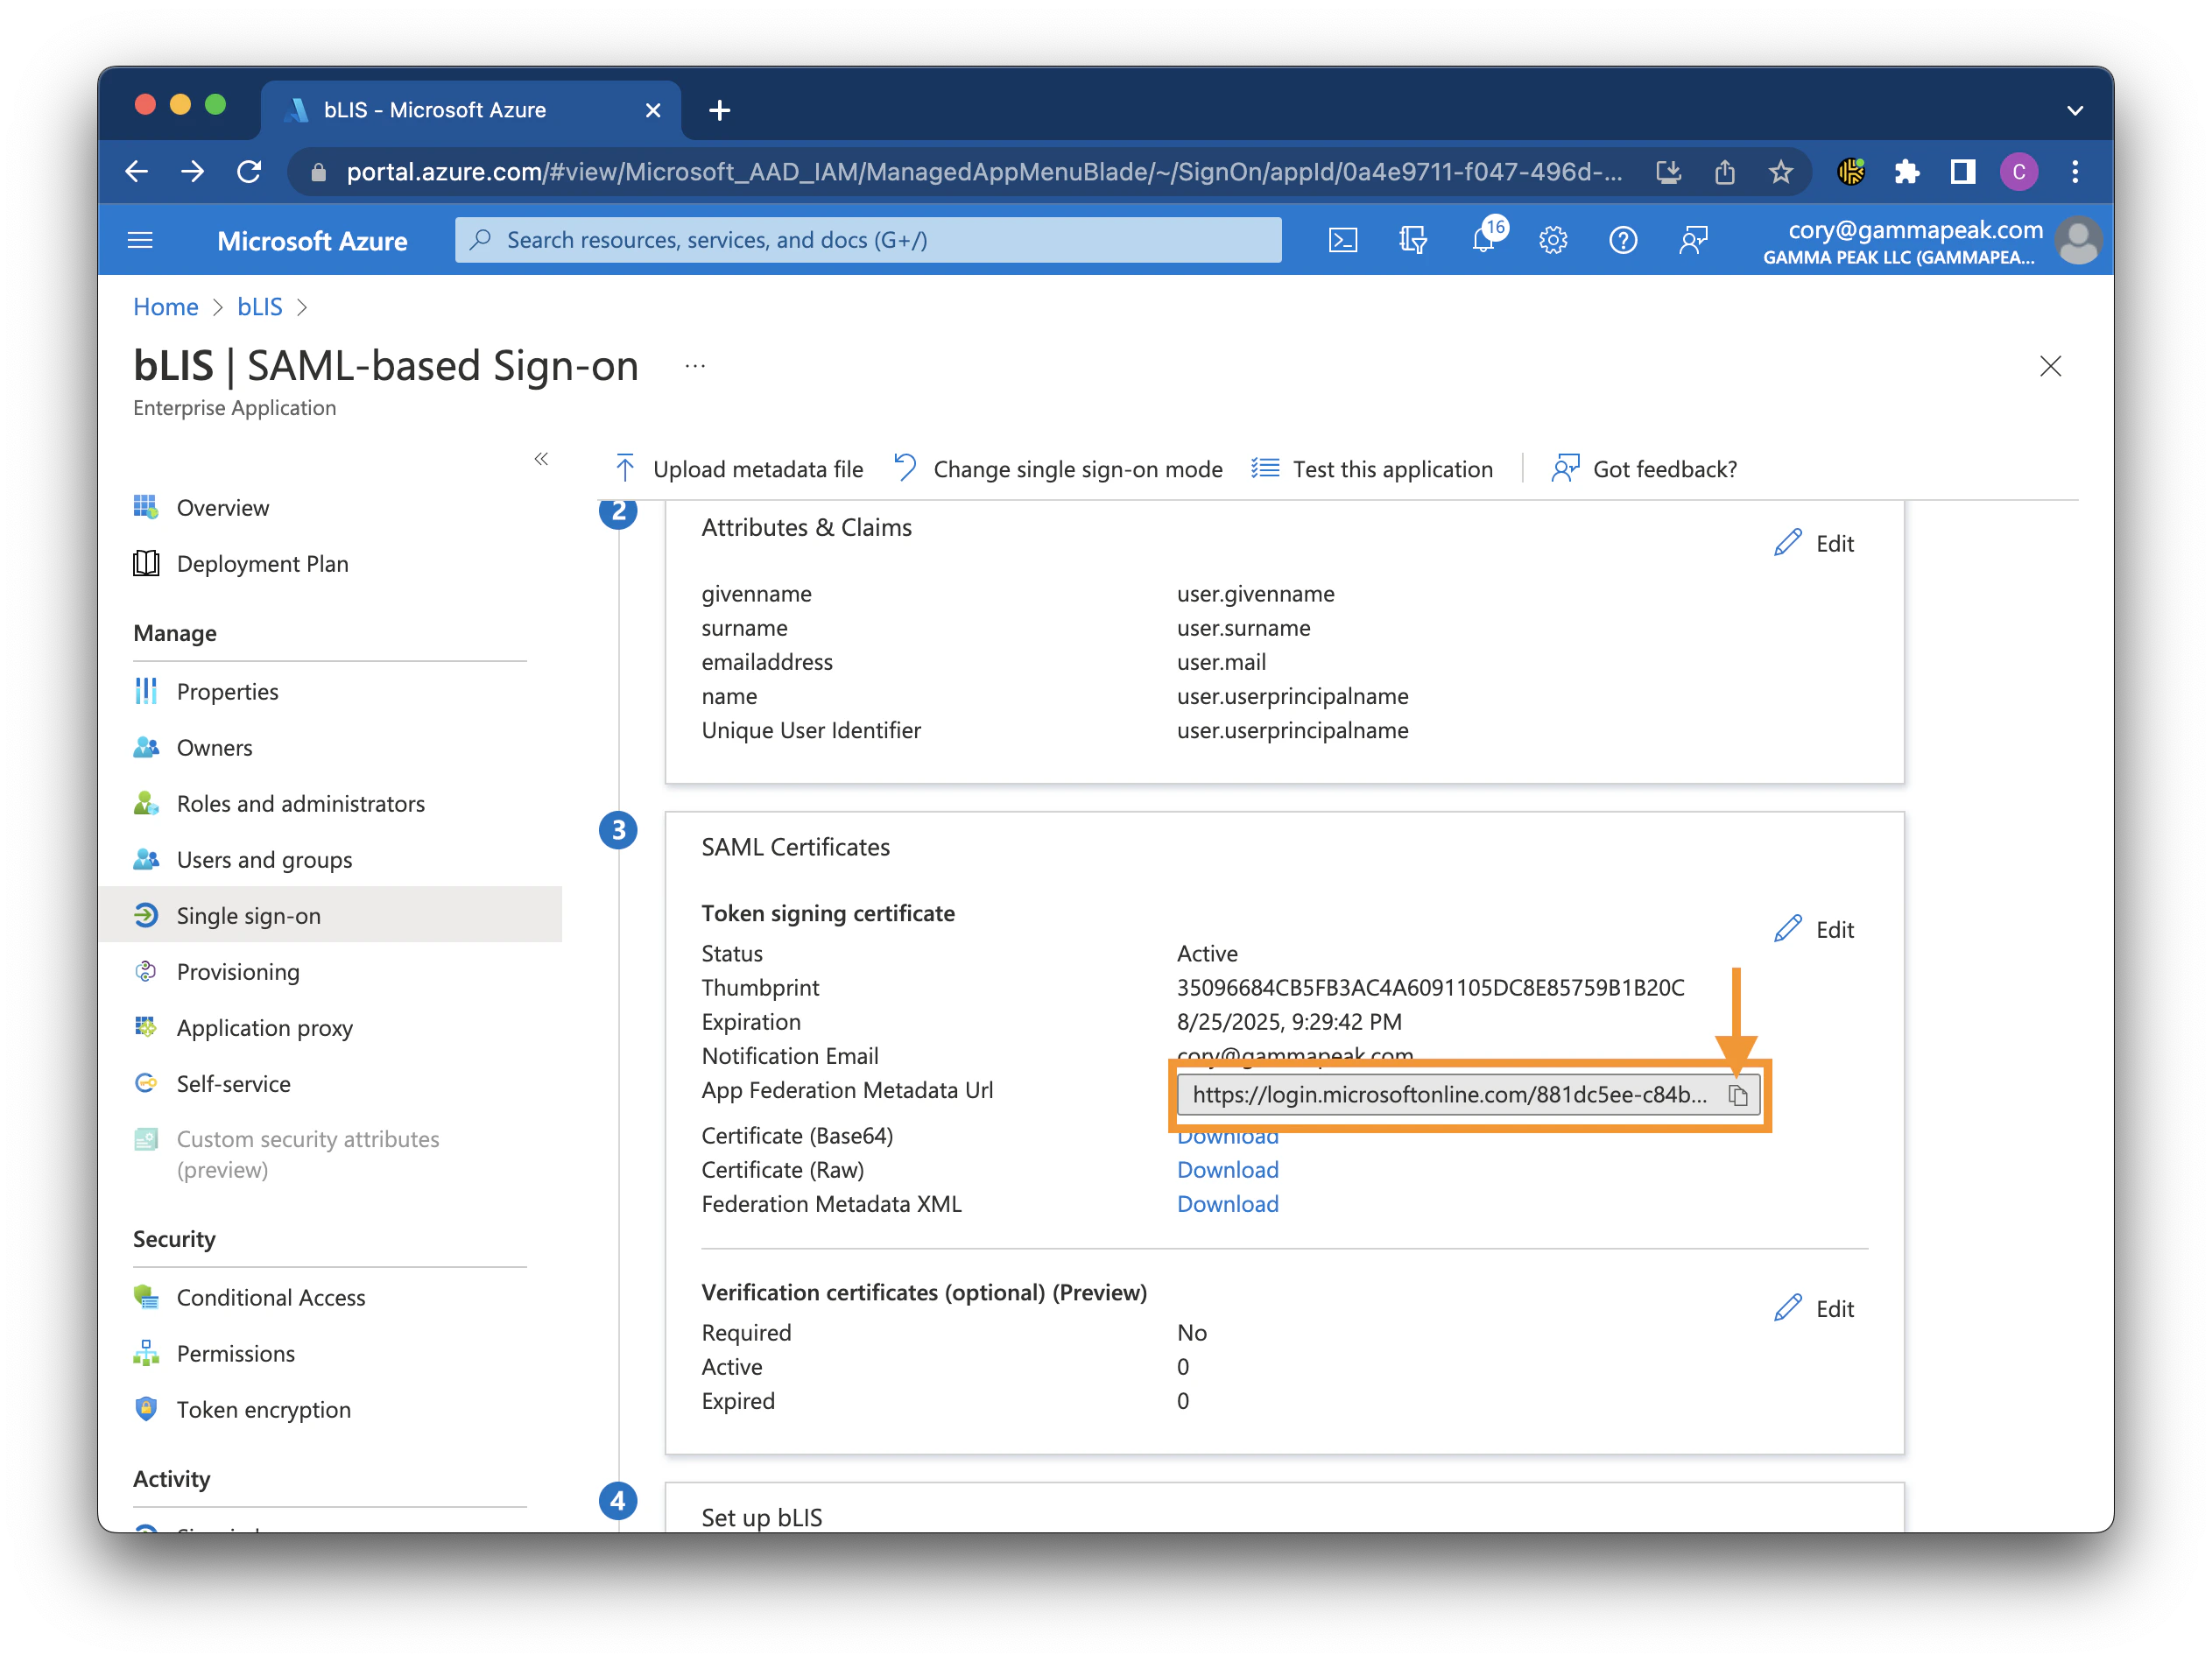 **Output:** Metadata URL
**Certificate (Base64)** — In the **SAML Signing Certificate** section, click **Download** next to **Certificate (Base64)**. Save the downloaded `.cer` file.
**Output:** Metadata URL
**Certificate (Base64)** — In the **SAML Signing Certificate** section, click **Download** next to **Certificate (Base64)**. Save the downloaded `.cer` file.
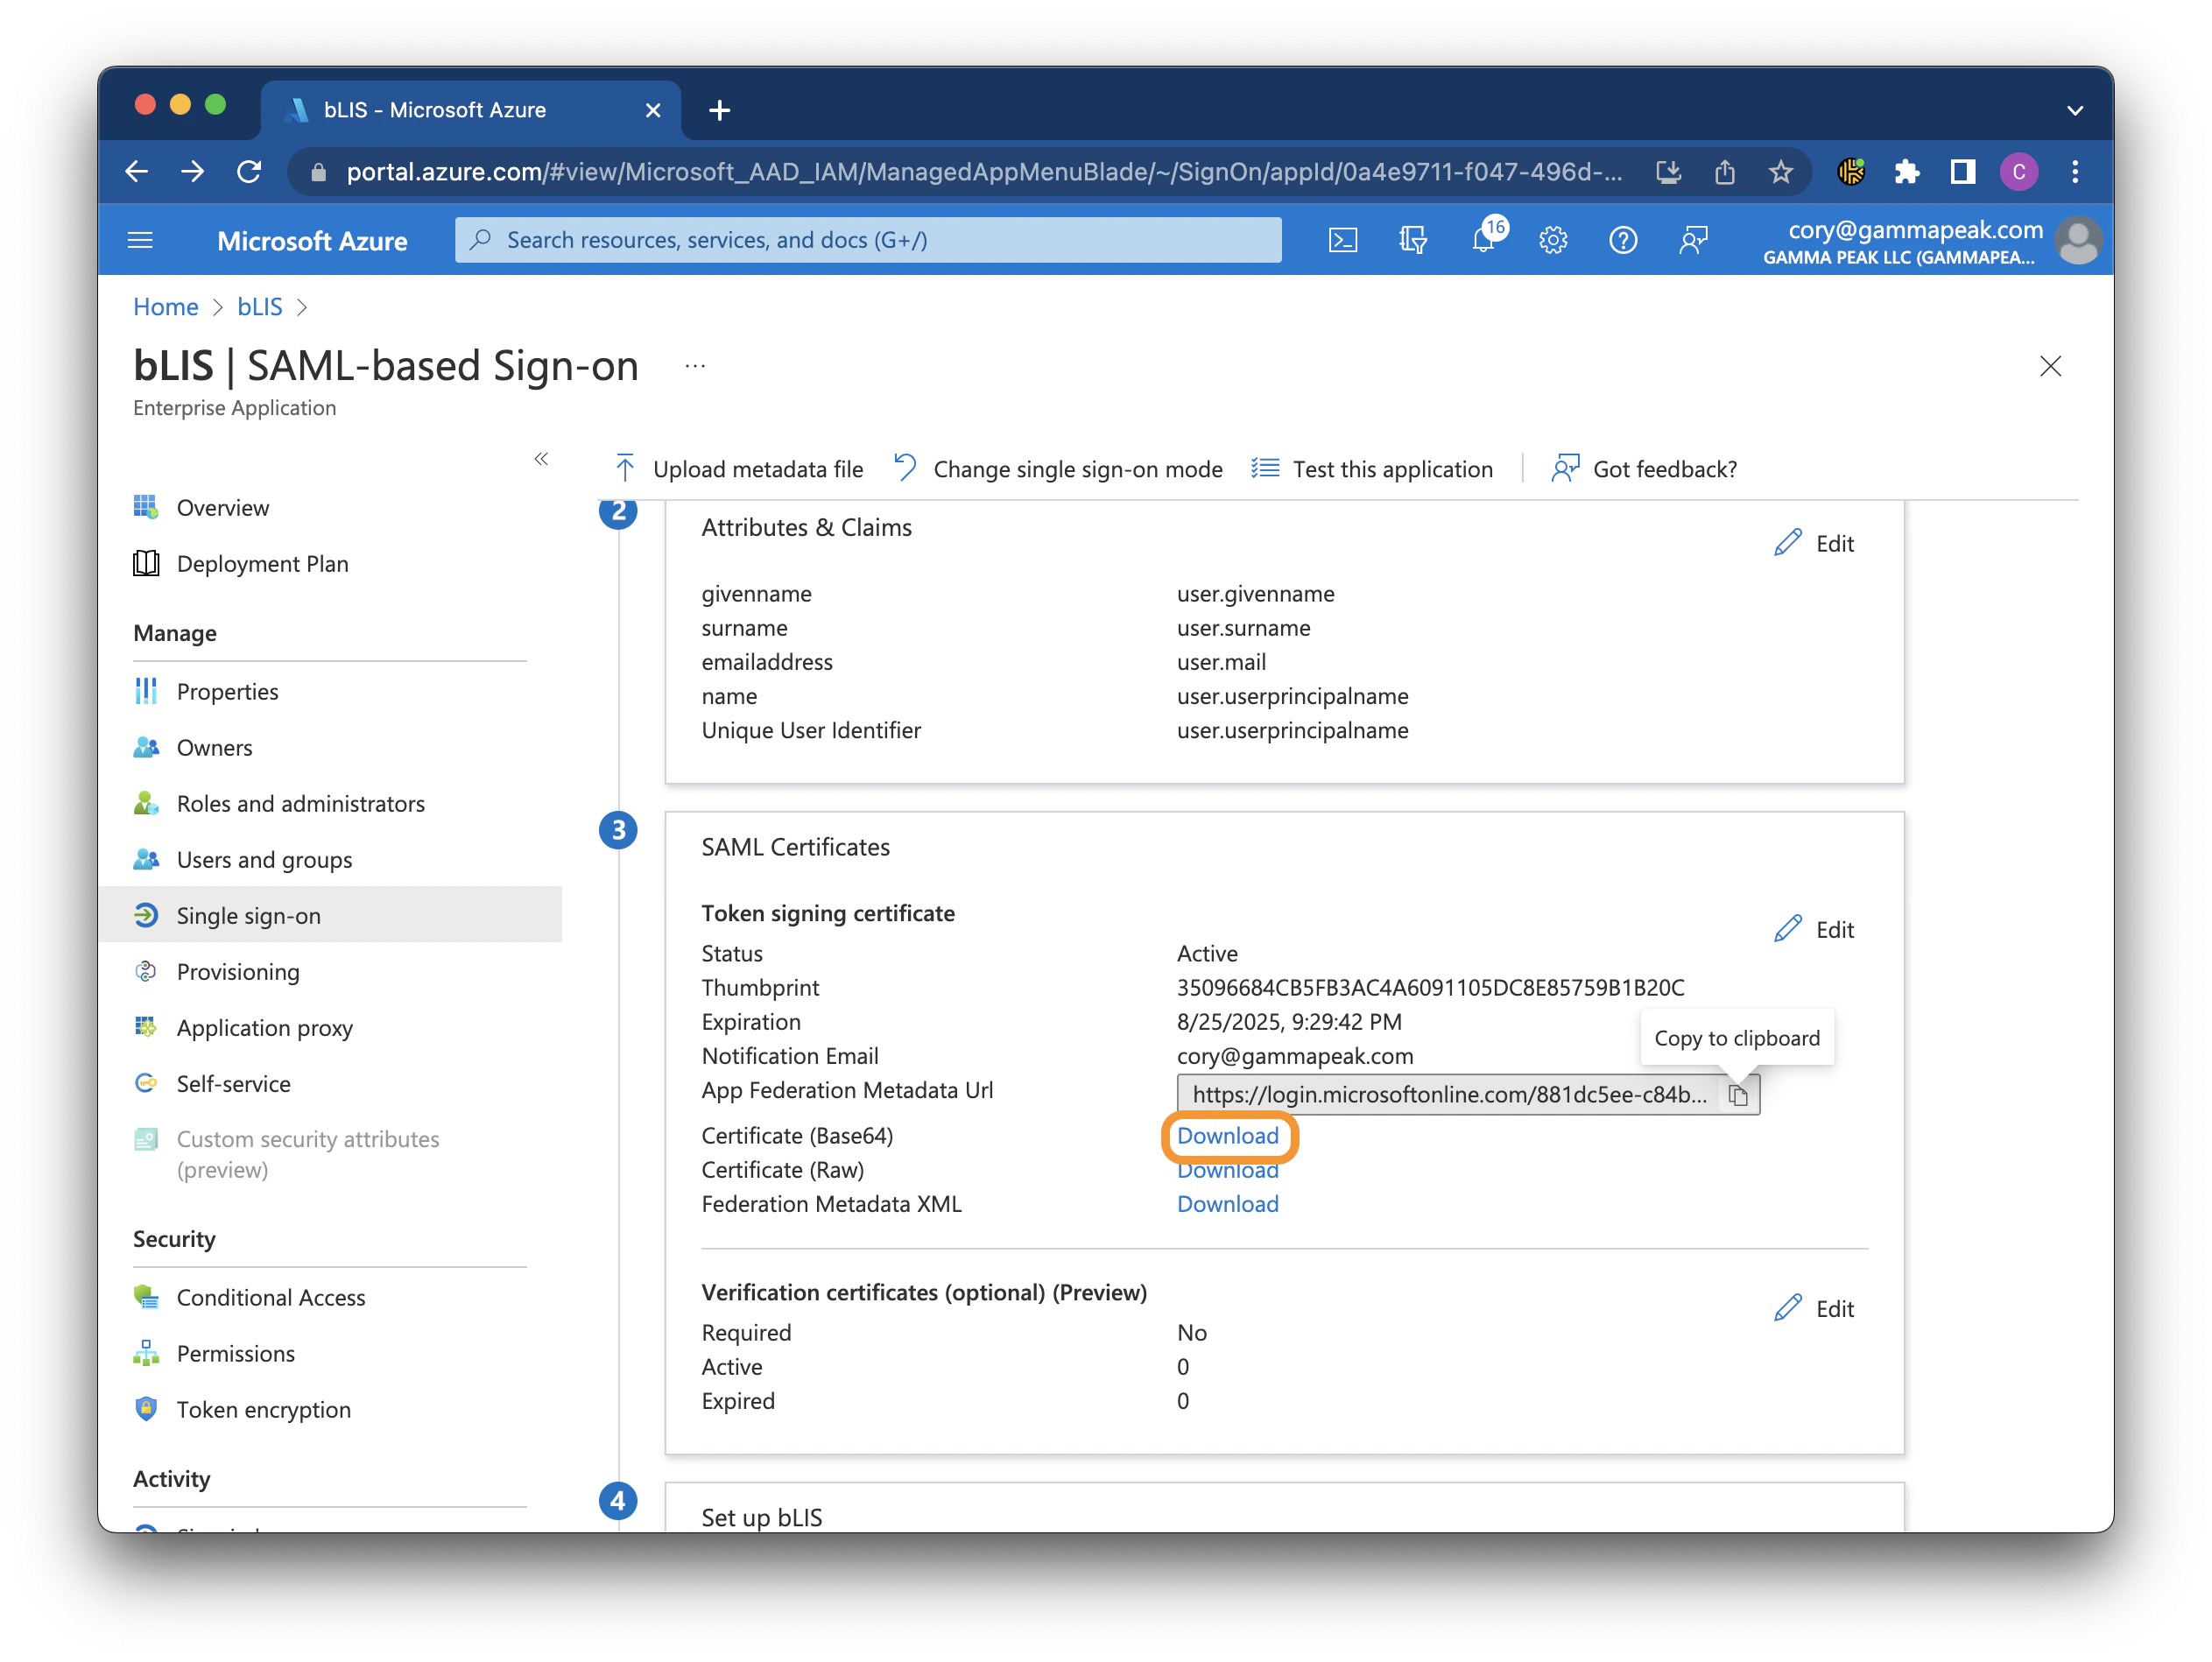 **Output:** Certificate (Base64) `.cer` file
**Login URL** — In the **Set up bLIS** section, locate the **Login URL** field. Copy and save this value.
**Output:** Certificate (Base64) `.cer` file
**Login URL** — In the **Set up bLIS** section, locate the **Login URL** field. Copy and save this value.
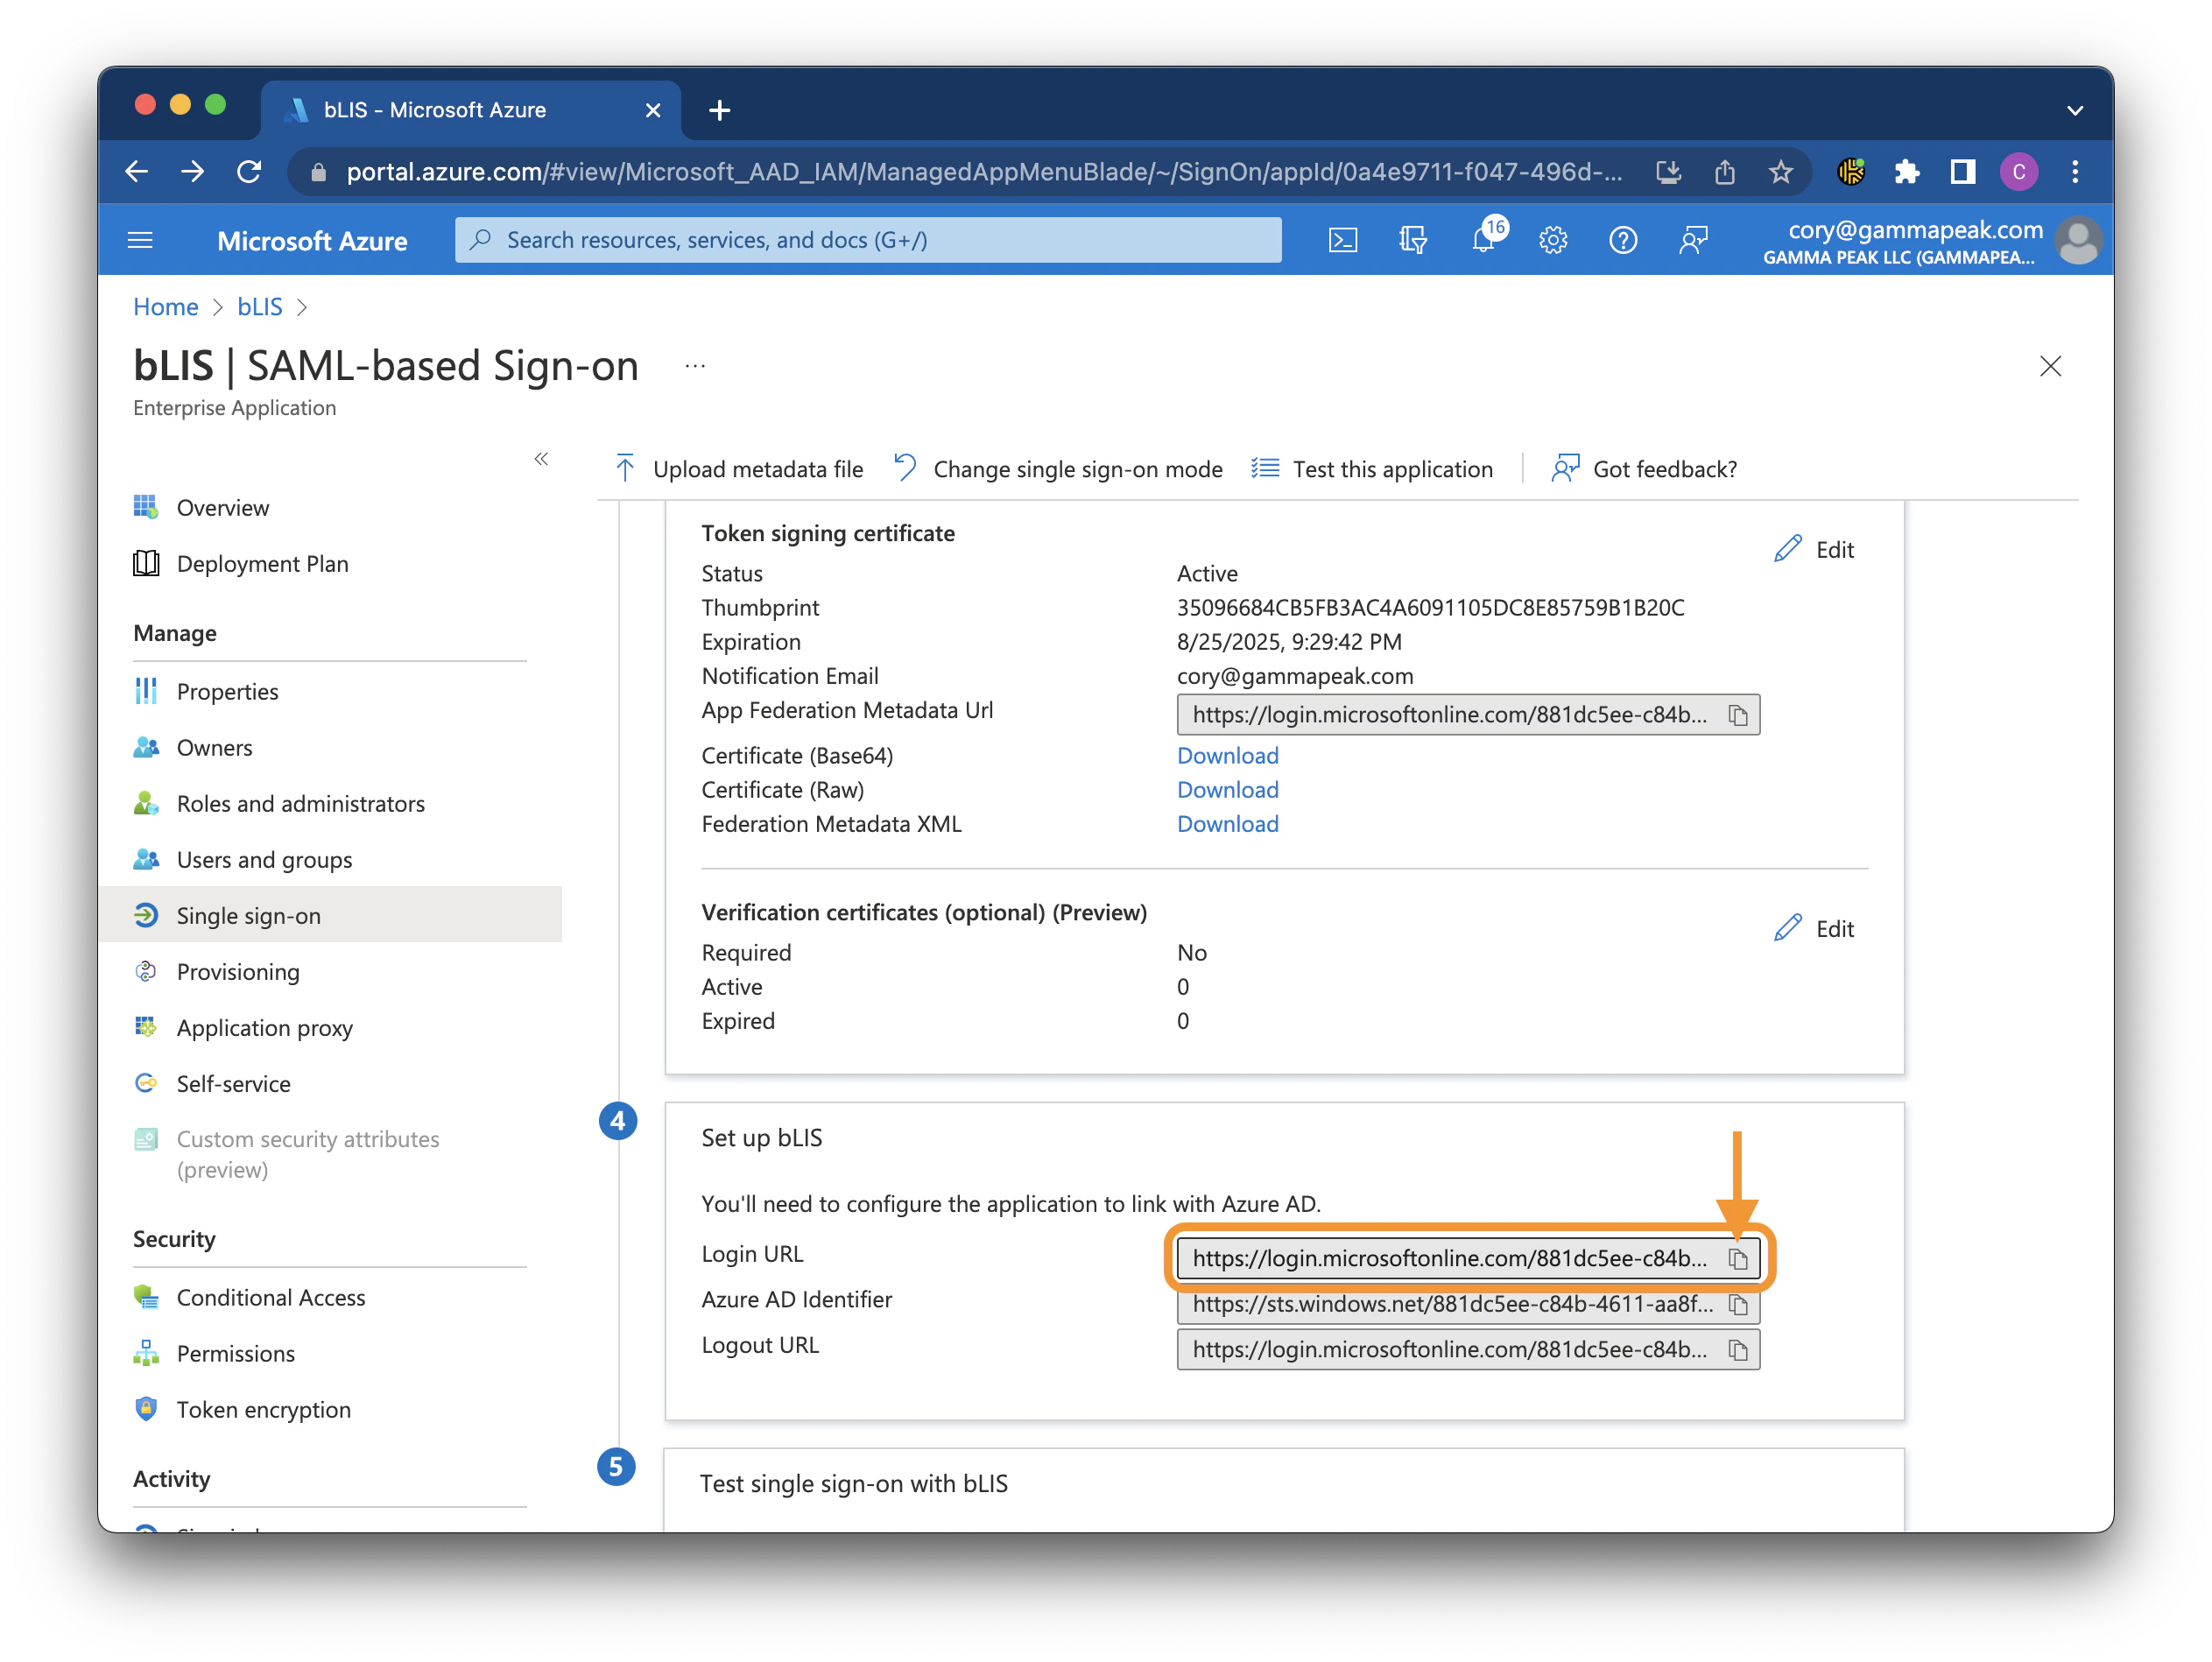 **Output:** Login URL
## 5. Send output values
Configuration in Azure Portal is now complete. Send the following output values to [support@blis.app](mailto:support@blis.app):
* **Metadata URL**
* **Certificate (Base64)** — attach the downloaded `.cer` file
* **Login URL**
For questions or support, please reach out to [support@blis.app](mailto:support@blis.app).
**Output:** Login URL
## 5. Send output values
Configuration in Azure Portal is now complete. Send the following output values to [support@blis.app](mailto:support@blis.app):
* **Metadata URL**
* **Certificate (Base64)** — attach the downloaded `.cer` file
* **Login URL**
For questions or support, please reach out to [support@blis.app](mailto:support@blis.app).